

Wondering how to spray a wasp nest without getting stung? You’ll want to attack it when the wasps are inside and less active, usually at dusk.
Wearing protective clothing and keeping your distance are key to avoiding stings.
With the right approach, you can safely eliminate the nest and stay safe.
The steps below will guide you through the process.
Why Timing Matters Most When Spraying a Wasp Nest
Spraying a wasp nest at the right time drastically reduces your risk of stings. The optimal time is at dusk or just before sunrise when wasps are inside and less active. During these hours, most wasps are sluggish and concentrated within the nest, making it easier to target and minimize their defensive response. Avoid spraying at midday because wasps are alert, highly active, and more likely to attack if disturbed. Weather conditions also play a crucial role; cool, calm, and dry weather keeps wasps less responsive and prevents the spray from dispersing or drifting away. Similar principles apply to covering a pond, where using pond netting options can effectively protect fish from debris and predators without disturbing the water feature. Warm, sunny, or windy conditions increase foraging activity and decrease targeting accuracy, raising your chances of provoking aggression. Combining early morning or late evening hours with stable, cool weather allows you to contact the entire colony effectively while significantly lowering the likelihood of being stung. For homeowners dealing with other pests, such as skunks, a coyote urine repellent can be a natural alternative to reduce unwanted visitors in your yard. While a bee suit is designed for honeybees, it may not fully shield you from aggressive wasp stings since wasps can sting repeatedly and often target thinner fabric gaps.
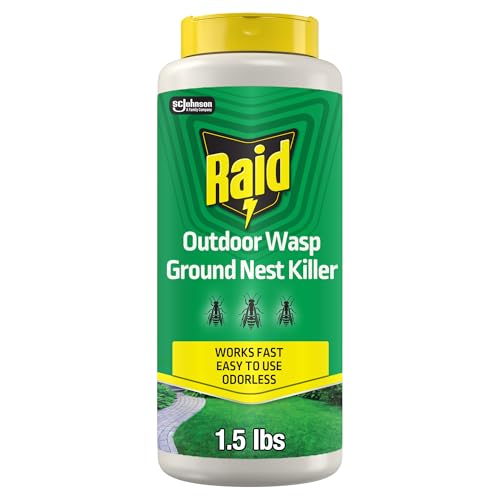
Ready-to-use, wasp nest killer, uses a waterproof dust that kills insects for up to 8 months

FAST KNOCKDOWN: Kills wasps, hornets, yellow jackets and mud daubers

The information below is per-pack only
Cover Every Inch of Skin Before Spraying a Wasp Nest
Cover every inch of exposed skin before you get near a wasp nest. Start with protective clothing such as a long-sleeved shirt, long pants, and thick, sting-resistant fabric. Tuck your pant legs into your socks or boots to prevent gaps. Seal glove cuffs over your sleeves and cover your neck, wrists, and ankles completely, as these are common sting points. Use a veil or hood to protect your face, securing it firmly at the collar. Opt for light-colored, full-body coveralls whenever possible, and ensure all seals are snug without leaving openings. Never leave any skin exposed— even a small gap can invite a sting. For optimal safety, also consider wearing a high-quality respirator that protects against both chemical sprays and airborne particles. Similarly, just as you would seal entry points on a roof with bird spikes to prevent pest access, ensure no gaps remain in your protective gear to keep wasps out. For indoor wasp issues, consider using apple cider vinegar traps as an alternative to chemical sprays.
Stand 10 to 20 Feet Away When Spraying the Nest
Standing 10 to 20 feet away from the nest, as your spray can’s label advises, keeps you outside the immediate danger zone. This range aligns with your can’s labeled reach, allowing you to spray effectively without creeping closer and provoking a defensive swarm. More distance provides additional time to retreat if the nest becomes active. A jet-style stream can precisely deliver insecticide from this range, even when the nest is hidden behind eaves or dense foliage. Be sure to position yourself to the side of the nest, have the wind at your back to prevent blowback, and keep your retreat path clear. Maintaining the farthest effective distance is your best safety measure for a quick and controlled treatment. For protecting nearby plants, consider bird netting for tomatoes to shield them from pests while you treat the nest.
Position Yourself to the Side So You Can Escape Fast
Position yourself to the side of the nest rather than underneath it to enhance your safety and improve your escape chances. Standing to the side reduces your exposure to falling spray and defensive wasp behavior, as agitated wasps tend to surge directly downward from the nest. Face the nest but keep your body offset so you can retreat quickly without crossing into their flight path. Always identify your escape route before approaching—make sure it’s free of obstacles like hoses or clutter and not blocked by barriers that could trap you. Take wind direction into account; spray downwind so the aerosol doesn’t blow back toward you. After administering the spray, leave immediately by your preplanned route using quick, continuous movements. Hesitation can increase risk; swift action keeps you safe if the wasps become aggressive. Keep in mind that wasp spray is toxic to pets like cats, so ensure they are kept far away from the treated area until it is completely dry.
Point the Nozzle at the Nest and Spray Thoroughly
Point the nozzle directly at the main nest opening—do not just aim at the surface—to ensure the spray reaches the deep interior of the colony. When using the spray, match your technique to the nest type. For aerial nests, aim at the bottom entrance, where wasps come and go. For ground or wall nests, target the visible exit hole. Keep the can upright and deliver a steady, continuous burst until the nest is fully saturated. Make sure to cover the entry area thoroughly, not just the interior, so wasps entering or leaving come into contact with the insecticide. Try to hit as many resting wasps as possible to maximize effectiveness. Follow your product’s instructions for the recommended spray distance and duration—typically 5 to 15 seconds. Avoid a light mist; ensure the nest is completely soaked for better results. Do not overapply once the nest is wet, as excess insecticide offers no additional benefit. For personal protection, wear nitrile gloves that are chemical resistant to avoid skin contact with the insecticide.
Leave Immediately After You Spray the Nest
Once you’ve saturated the nest, leave the area immediately rather than waiting to see the results. Do not linger to inspect the nest or watch the wasps’ reaction. Move along your planned path with calm, controlled steps, as sudden movements can trigger an attack. Creating distance is your top priority to ensure safety and allow the insecticide to work effectively. For instance, using secure wire mesh options can help keep cats out of treated areas. For those dealing with similar wood-destroying insects, consider using top bee traps designed specifically for carpenter bees to prevent future infestations.
Follow the product label’s re-entry interval, which is usually a full 24 hours before you remove the nest. The residual insecticide keeps working on any returning wasps, so stay away until it is dry, typically two to four hours after application. Re-entering too soon increases chemical exposure risks, especially if the spray is still damp. Time your retreat during low activity periods, like early morning or late evening, to minimize the chance of aggressive swarms. Wait until you observe no signs of activity before inspecting the nest again. Stragglers may appear the next day, so treat the nest as active until you are certain it is inactive. For similar safety precautions, avoid using sweet or strong-smelling baits near your home, as they can attract unwanted pests.
Keep Children and Pets Indoors Until the Spray Dries
After the spray has dried completely, keep children and pets indoors until then. Wet insecticide poses the highest risk, so do not let anyone re-enter the area until surfaces are dry. This typically takes about 1 to 4 hours, but always check your product label for the exact waiting time. Careful ventilation after drying is essential; open windows to air out the space and help dissipate chemical odors. Remember, children and pets should only re-enter once the spray is fully dry and the room has aired out to ensure safety. If any chemical smell persists, it’s best to wait longer before allowing access again. For severe infestations, consider using a targeted bug bomb instead of just a spray to ensure thorough coverage of hidden areas. Keeping this in mind is key to protecting your household from potential chemical exposure.
When to Call a Professional Instead of Spraying a Nest
Call a professional if the nest is larger than a football, hidden in a wall or attic, or belongs to aggressive species like yellowjackets or bald-faced hornets. Large nests or those concealed make it difficult to assess the colony’s size and pose safety risks when attempting removal yourself. Spraying blindly into a hidden or enclosed nest can provoke a defensive swarm of wasps, increasing the chance of stings. Proper species identification is essential because yellowjackets and bald-faced hornets tend to attack en masse when disturbed. If previous attempts to spray have failed or you notice more than 20 wasps entering a single point, the colony is likely too mature for safe DIY removal. Also, if someone in your household has a sting allergy, call a professional immediately, as even a single sting can be life-threatening. For large, hidden, or aggressive infestations, a professional will also have access to high-performance bug bombs that can treat entire enclosed spaces more safely and effectively than any consumer spray. Avoid handling nests that block doorways or are located near high foot traffic to prevent accidents or allergic reactions.

【Efficient 3-Blade Scraper】This wasp nest removal tool is fitted with a sharp triple-edge blade to slice through wasp, hornet, and mud dauber nests effortlessly. (Warm Reminder: The blade is coated with anti-rust oil; slight welding marks on screws are normal and won’t impact performance. Feel free to contact us if you need help.)

6-in-1 Wasp Nest Removal Tool Set:This tool set is a versatile solution that makes it easy to remove and clean wasp, wasp, yellow jacket, and bird nests. wasp nest removal tool includes an aluminum telescoping wand, multi-edged blade, 3-inch scraper, spray can extension wand adapter, cleaning brush and safety goggles.
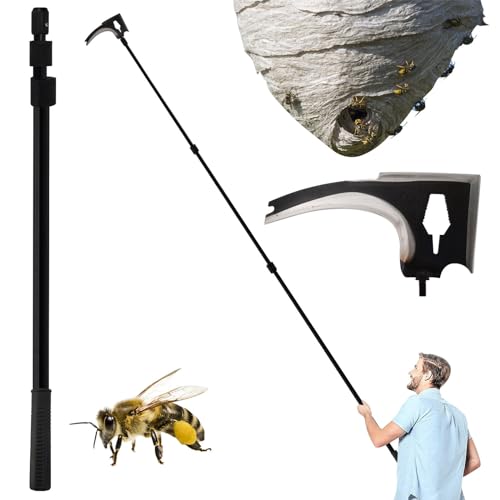
3 knife edges Design: This tool serves as a versatile solution for safely removing and cleaning Trap wasp, hornet, and yellow jacket nests, Bird Nest, ensuring a hassle-free experience for homeowners and bee Nest control professionals.
Skip the Ladder and Don’t Spray in Wind or Rain
When spraying a wasp nest, skip the ladder entirely and keep both feet on the ground. Stand at a distance of 6 to 15 feet from the nest, as most insecticide labels recommend. Position yourself with the wind at your back to ensure the spray drifts toward the nest rather than your face. Avoid spraying in rain because moisture washes away the insecticide before it can dry, making the treatment ineffective and risking runoff. Unlike some pest control myths, ultrasonic pest repellers have been tested and proven ineffective at repelling bed bugs, showing that not all pest solutions work as claimed. Dry, calm evenings are ideal for accurately identifying the nest and applying treatment safely. Always keep an escape route clear and only spray when you can retreat quickly. If environmental conditions are unfavorable, wait until they improve; rushing can reduce safety and diminish the likelihood of success.

Two 14 oz cans of Raid Wasp & Hornet Killer Spray kill flying, stinging bugs on contact, including paper wasps, yellow jackets, mud daubers, bald-face hornets, and more

Kills the entire nest.

Raid Max Foaming Wasp & Hornet Killers fast coverage foam kills the entire wasp nest
How to Spot a Hidden Nest That Needs a Pro
To spot a hidden nest that needs a professional, listen for persistent buzzing or rustling sounds inside walls or ceilings. These noises indicate active insects in structural cavities. Outside, observe for a steady flight line of two wasps flying back and forth, converging on a small crack, vent, or opening. If more than five to six wasps use the same entry point within 15 minutes, it signals a hidden colony nearby. Warm spots, damp patches, or scratching sounds behind drywall also point to internal nests. Indoor sightings near windows, lights, or electrical outlets further confirm activity. If the nest is inside a structural cavity, especially near high-traffic areas or after a failed DIY attempt, contact a professional immediately—these spots are difficult and risky to treat alone. Effective mouse trap baits can help lure pests away from problematic areas. When dealing with outdoor access points, consider using professional-grade trap options to safely manage any rodent activity that may attract wasps. For blocking potential entry points against both rodents and insects, use hardware cloth that is designed to resist gnawing and corrosion.