

Struggling to control pesky rats around your home? Building your own bait station can be a simple and cost-effective solution.
With just a few basic materials—like a PVC pipe and some fittings—you can create a safe, effective trap for under $10.
By the end, you’ll know how to assemble a sturdy bait station that keeps rodents out of reach from kids and pets.
Keep reading for all the steps and tips to do it right.
Decide When to Build vs. Buy a DIY Rat Bait Station
Building your own bait station is ideal when you need a custom size or shape to fit specific entry points, fence lines, or tight spaces. It’s particularly advantageous if you have scrap materials on hand and the bait label allows DIY construction. However, safety considerations are crucial: your homemade station must restrict access by children and non-target animals, close securely, and anchor firmly to the ground. If the bait label prohibits homemade designs, purchasing a commercially made station becomes necessary. For pond owners, best pond netting also demonstrates how different materials suit different access points and environmental conditions. For carpenter bee control, the importance of selecting effective traps highlights that proper design and entry hole size are critical for capturing target pests.
From a cost perspective, building your own can reduce expenses upfront, especially if you already possess suitable materials. But remember, proper compliance documentation and immediate availability can make buying more practical, saving you time spent on trial and error. Durability is another factor; a DIY build may be cheaper for multiple stations but might require more maintenance over time. Choose to build if you prioritize low cost and a custom fit, or opt to buy if you need a quick, tamper-resistant solution.

RAT AND MOUSE BAIT STATION: Tomcat Rat & Mouse Killer, Child & Dog Resistant, Refillable Station is a reusable rat and mouse bait station with bait block refills that each kill up to 3 rats (based on no-choice laboratory testing)

WHERE TO USE: Use these mouse and rat bait blocks indoors or outdoors; if applied where children, pets, and non-target animals may have access, bait blocks must be placed inside tamper-resistant bait stations

PREFILLED RAT AND MOUSE BAIT STATION: The Tomcat Rat & Mouse Killer, Child & Dog Resistant, Disposable Station is a bait station pre-filled with one bait block that kills up to 10 rats (based on no-choice laboratory testing)
Materials and Tools You’ll Need for a PVC Station
To build your own bait station, you’ll need specific materials and tools. Use a 4-inch diameter, 24-inch long Schedule 40 PVC pipe—black or ABS is ideal for outdoor durability. T-shaped fittings and end caps create entry points, while a cleanout tee with a threaded plug allows secure bait access. To suspend bait, a threaded rod or wire inside the tube, with washers and nuts, works well. Solid bait blocks with central holes are preferred over loose bait. This design effectively controls small rodent populations by using an auto-feed mechanism as bait is consumed. For added security against chewing, consider using galvanized wire mesh to reinforce the station’s exterior. For homeowners dealing with stray cats, using a live animal trap can safely capture nuisance animals without harming them. When using a live animal trap, remember to check local regulations before setting it up.
For tools, a hacksaw or PVC cutter ensures clean cuts, while a drill with matching bits is needed for fitting hardware. Sandpaper helps smooth rough edges to prevent injuries and ensure proper fitting. Don’t forget gloves for safety and PVC adhesive if you plan permanent joints. To keep your station stable, use a wood base and pipe brackets for securing in fixed positions. Regular maintenance involves inspecting for moisture damage and replacing the bait monthly to keep it fresh and effective.

SECURE COMPACT DESIGN - High-quality, lockable, tamper-resistant, only 8.5" x 7" footprint

What you get: Set of 6 Tomcat Outpost rat bait stations (8.5" x 7" x 5" each) with lockable, tamper-resistant design. Bait and traps sold separately — pair with Tomcat Bait Chunx or Tomcat Rat Snap Trap for complete rodent control.

RODENT CONTROL: Two openings allow easier access for rats and mice
Step-by-Step: Assemble Your Own Rat Bait Station
Start by assembling the station body with a 4-inch diameter PVC pipe and a T-shaped connector. These parts create a stable, horizontal or inverted-T layout with two open entry points designed for rats to enter easily. Fit the pieces tightly to ensure stability, but avoid gluing them together—this allows quick access for bait replacement and maintenance. Smooth any rough edges on the PVC to prevent injuries and to make sure the interior space remains unobstructed for bait placement and rat passage.
Secure the bait inside the central protected section of the station. Use bait blocks or cubes specifically designed for rat stations, and attach them to an internal wire or rod to prevent easy removal. This setup keeps the bait sheltered from environmental elements and tampering, maintaining its effectiveness over time without spillage or contamination. For additional safety, wear gloves and follow safety protocols to avoid contamination and exposure during handling. For outdoor placement, choose a top tree guard design that prevents larger animals from accessing the station. Unlike electronic bug zappers, which use ultraviolet light to attract insects, this bait station relies on scent and shelter to draw rodents.
Add retention features to keep rats inside once they enter. Drill entry holes approximately 2.5 inches in diameter, enough for rats to pass through comfortably but discouraging larger animals. Install caps or covers over these entry points to contain the bait and prevent rats from escaping easily. When handling bait, wear gloves and follow safety protocols to avoid contamination and exposure. Finally, secure the entire station by anchoring it with screws or zip ties to prevent tipping or movement during use. Mice follow their own scent trails to navigate and return, so placing the station along walls where they travel increases uptake.

Bait Not Included

Warm Tips: Please remove the black button in advance if you need to switch to key unlocking mode.

Kills Rats & Mice
Place Your DIY Bait Station Where Pets and Kids Can’t Reach
Place your bait station where pets and kids cannot reach. Use locks, and keep stations inside utility cabinets or sheds to prevent accidental access. Avoid placing them on floors, in play areas, or in living spaces to reduce risks.
Position stations flush against walls along known rodent travel routes. Look for signs like droppings, gnaw marks, or burrows to determine the best spot. Hide stations behind objects or in corners and never leave them in open, exposed areas. For outdoor placements, consider CO2-based mosquito traps as a complementary pest control method, since they attract and capture insects without requiring toxic bait.
Ensure the long side of the station contacts the wall with openings facing outward. If you need to place a station where children might reach, choose a tamper-resistant and child-resistant model. Secure the station to the ground or fence to prevent movement.
During installation, keep children and pets indoors. Never place loose bait outside the station, and store all rodenticides where pets and kids cannot access them. Consider using top bird netting solutions for pigeon control if birds are also a problem in the area, as this can reduce the need for rodenticides near nesting sites. Following these safety measures minimizes accidental exposure and keeps your household safe.
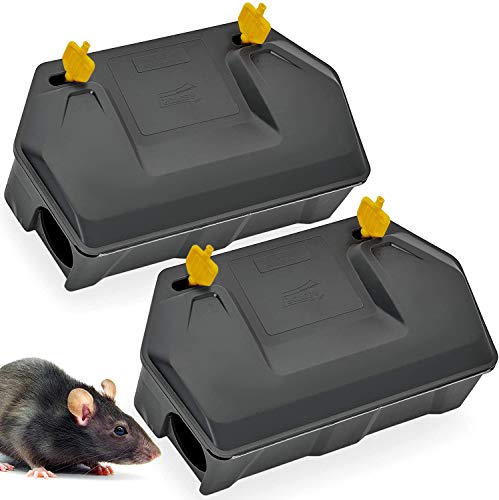
OUTDOOR BAIT STATION FOR RODENT MANAGEMENT: Designed for use in garages, sheds, patios, warehouses, barns, and other indoor outdoor spaces.

KILLS MICE EFFECTIVELY: Tomcat Mouse Killer, Child & Dog Resistant, Refillable Station contains a reusable bait station plus 8 bait block refills that each kill up to 12 mice for easy pest control (based on no-choice laboratory testing)

BAIT NOT INCLUDED (sold separately): works with every bait format. The internal metal rod holds blocks, grain or paste firmly in place for controlled, mess-free use.
How to Load a DIY Rat Bait Station Without Spilling Poison
To load your DIY rat bait station without spilling poison, follow these steps carefully. Wear gloves to protect your skin and handle bait safely. Instead of pouring loose poison into the chamber, place bait blocks onto the built-in rods designed for this purpose. Slide each block onto a rod, making sure it is centered to remain stable during handling and rodent activity. Limit the number of bait blocks to the station’s rated capacity—usually one per rod—to prevent overcrowding. For horizontal rods, each rod can hold two bait blocks, offering increased capacity. Additionally, always position the station away from children and pets to ensure safety. For a more durable and weather-resistant option, consider using mosquito dunks as an alternative active ingredient. Unlike wasp stings, which can penetrate bee suit mesh if the fabric is pressed against the skin, rodents chewing on bait stations require a sealed and sturdy enclosure.
Work over a flat, stable surface to catch any accidental drops. If you drop a bait block, you can quickly recover it without contamination. Push the bait fully onto the rod so it stays secure during movement or activity. For vertical rods, thread the bait blocks securely onto the rod, and for horizontal rods, reinstall them into the correct grooves.
Once loaded, close and latch the lid tightly to contain the poison inside. Confirm that the station sits upright and that the lid snaps shut securely, ensuring it is properly sealed. After setting the trap, clean any loose crumbs or residue immediately, and dispose of spilled bait according to the label instructions, prioritizing safety and cleanliness.

EFFECTIVE PEST CONTROL: Delivers reliable rodent management for home or commercial use. Designed to attract and eliminate unwanted pests quickly and efficiently for peace of mind.
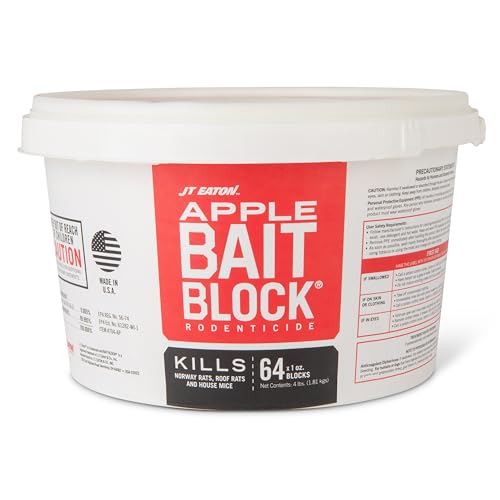
APPLE-FLAVORED BAIT BLOCKS: Apple-flavored 1 oz bait blocks eliminate rats and mice within days of feeding - 64 blocks per 4 lb tamper-evident pail for residential, agricultural, and commercial rodent control.
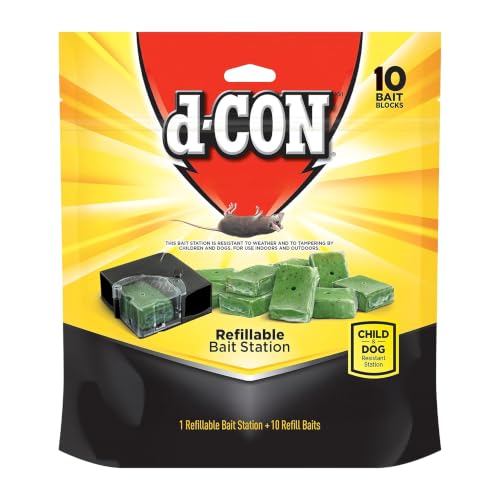
d-Con bait is so tasty that mice will risk their lives for it which helps reduce house mice problems
Avoid These Three Mistakes That Expose Kids or Pets
Securing your DIY rat bait station is essential to protect children and pets from poisoning. Avoid these three common mistakes to ensure safety. First, always use a tamper-resistant design with a lockable enclosure that prevents small hands and paws from accessing the bait. An open or loose setup can easily be tampered with or knocked over, exposing curious fingers or mouths to poison and failing to meet chemical safety standards.
Second, carefully choose placement by keeping stations out of reach of children and animals. Never put bait stations near play areas, pet food, or livestock. Make sure the station is anchored securely so that wind or animals cannot tip it over and spill the bait, which could be accidentally ingested.
Third, follow all label instructions precisely when using rodenticide. Do not assume your homemade setup is child-proof or meets legal safety requirements. Store bait and stations away from food and always keep stations closed and intact. Regularly check the station for cracks or broken latches to prevent secondary poisoning risks from dead rodents or spilled bait. Proper placement and maintenance are key to keeping your household safe.