


Struggling with wasps invading your space? A simple DIY trap can help keep them at bay, and it doesn’t have to be expensive or complicated.
By building a basic trap with a few household items and switching bait seasonally, you can catch these pests effectively.
In this guide, you’ll learn how to make an easy, affordable wasp trap and find out the best placement and bait tips.
Keep reading to get all the details you need to control wasps around your home.
Build a DIY Wasp Trap in Minutes
To build a DIY wasp trap in minutes, start by cutting a clear plastic 2-liter soda bottle about one-third of the way down from the top. Remove the cap, then flip the top section upside down and fit it into the base, creating a funnel. Seal the join with tape or staples, ensuring the funnel neck sits above your bait liquid.
Consider color schemes to attract wasps more effectively. While clear bottles work well, wrapping the outside with yellow or white tape can increase the trap’s visibility and appeal to wasps. Avoid dark colors like red or black, as these tend to be ignored by wasps. Punch two holes near the top rim for a hanging loop, thread some string through, and position the trap near areas with wasp activity, away from seating or outdoor dining spaces. This design allows for quick assembly using common household tools and materials. For a similar trapping approach, best skunk traps often use a one-way door mechanism that works on the same principle of funneling an animal into a container. Unlike wasps, pigeons require exclusion netting that blocks access to ledges rather than capturing them. When selecting bait for the trap, consider using a sweet liquid like sugar water or fruit juice, as these are highly attractive to wasps, similar to how carpenter bee traps often rely on visual cues and pheromone lures to draw in their target pests.
Use Protein Baits in Spring and Early Summer
Use protein bait in spring and early summer when paper wasps and yellow jackets are most focused on brood-feeding. Strong-smelling options like tuna, wet cat food, or fish scraps work best because they attract these insects more effectively than sweet baits in cooler conditions. Place a small amount of bait in your DIY trap, suspended above soapy water to lure the wasps into the trap. Avoid using too much bait, as excess can create strong odors that alert the insects and reduce effectiveness. Refresh the bait every three days because it spoils quickly, ensuring the attractant remains enticing during peak activity periods. This approach is similar to baiting a mousetrap, where strong-smelling protein options also outperform sweet baits in cooler weather. This timing targets the wasps when they are most focused on feeding their young, rather than searching for carbohydrate-rich foods. For a similar principle, a DIY gnat trap often relies on apple cider vinegar as an effective alternative attractant. You can also use a piece of pond netting over the trap opening to keep larger pests out while still allowing wasps to enter.

REFILL: Replacement lure to be used with Spectracide Wasp, Hornet, & Yellowjacket Trap. Each lure lasts up to 30 days.

Effective Control – These offer a simple and chemical-free solution to protect your wooden structures from damage.

FOR RESCUE! WHY TRAP - This refill works with the RESCUE! WHY Non-Toxic Reusable Trap for Wasp, Hornet and Yellowjackets, and provides 2 weeks of attractant power.
Switch to Sweet Baits in Late Summer and Fall
As late summer and fall approach, switching your wasp trap from protein to sweet baits is essential because their foraging behavior shifts to seek carbohydrates for energy. Use options like sugar water, flat soda, or fruit juice, which mimic fermenting fruit and attract wasps during this season. A simple mixture of one part sugar to four parts water works well, or try equal parts apple juice and beer with added sugar for a stronger lure. For a truly cost-effective approach, you can use scrap items like empty soda bottles as the trap container. Replacing the bait regularly is key, as evaporation alters the strength of the scent, and refreshing reduces the chances of competing attractants like outdoor drinks. Place traps away from human activity to prevent disturbing your guests and ensure the wasps are drawn in. For securing bait stations, consider using hardware cloth to prevent larger pests from accessing the trap. This change in bait dramatically improves trap effectiveness when wasps crave sugar, helping to reduce their presence around your home. For an even more effective solution, consider a peppermint oil spray as a repellent alternative to traps.

FOR RESCUE! WHY TRAP - This refill works with the RESCUE! WHY Non-Toxic Reusable Trap for Wasp, Hornet and Yellowjackets, and provides 2 weeks of attractant power.

Complete Wasp Trap Set: This outdoor yellow jacket trap set includes 4 wasp traps, 8 attractant refills, and 4 hanging strings. This complete hanging wasp trap set provides everything you need to help reduce wasps, hornets, yellow jackets, and fruit flies in outdoor spaces. One wasp trap with 2 packs of attractant lasts for 3-6 weeks with no daily maintenance required. Please note: Use At Least 20 Feet From Living Areas

Outdoor use only: Hang this outdoor fly trap bags for chicken coop about 20 feet from your house, ideally near trash spots, animal pens, patios, or other fly-heavy areas. As a professional wasp trap bags, fly traps outdoor hanging for chicken coop draws flies away from your home. The pre-installed fly bait is derived from fish and grains, outdoor fly trap for chicken coop helps keep outdoor areas more comfortable for your family and pets
Boost Your Bait With Dish Soap and Vinegar
Adding dish soap and vinegar to your bait enhances its effectiveness. Just a few drops of dish soap break the surface tension, causing wasps to sink and drown quickly. Be careful not to add too much, as excess suds can disrupt the mixture’s ability to attract pests. Apple cider vinegar, at about one tablespoon per cup of bait, creates a scent profile that appeals to wasps while discouraging bees. Stir gently to prevent creating excessive bubbles. Keep in mind that this bait works best when your trap is positioned correctly, so consider placement carefully. Check and refresh your bait every few days to maintain its potency. A mixture of equal parts water, sugar, and apple cider vinegar mimics the ripe fruit aroma that attracts wasps effectively. For safety, remember that a bee suit does not reliably shield you from wasp stings if the trap is disturbed. Unlike mice, which bug bombs may fail to kill and can expose them to dangerous chemicals, this trap avoids such risks entirely.

For RESCUE! Yellowjacket Traps – This attractant refill works inside any reusable RESCUE! Yellowjacket Trap. Two vials of attractant are enclosed, each lasting 2 weeks.

Interchangeable: We provide 8 sheets of glue cards to meet your needs, but please note they are compatible only with the wasp traps sold in our store. Simply wash and replace the sticky paper to reuse them, making them both environmentally friendly and economical.

Traps Multiple Species – Unsure if your problem is wasps, hornets, or yellowjackets? The RESCUE! WHY Trap attracts all of them, so you’ll never need to identify an insect. Simply hang outdoors and watch them pile up.
Place Your DIY Wasp Trap for Best Results
Place your DIY wasp trap at least 20 feet away from areas where people gather, such as seating or dining zones. This distance helps intercept foraging wasps before they reach you and reduces nuisance. Hang traps 4 to 6 feet high at eye level in open spaces like fence lines, garden edges, or backyard corners where wasps naturally travel. Positioning traps along fruit trees, compost bins, or less-traveled paths makes use of their natural foraging routes. Building a simple build process for a rack can keep multiple traps organized and elevate them to the proper height. Consider that bird netting can also protect blueberry bushes from wasps by blocking access to fruit. Placing traps at this height also mimics the effective elevation used in havahart trap setup for small animals.
Use morning sun to help scents disperse, but shift to shaded spots if afternoon temperatures exceed 80°F to prevent overheating. Good airflow around the trap enhances scent detection, so avoid placing traps in hidden or enclosed spots. Keeping traps in open, well-ventilated areas draws wasps away from activity zones, providing effective protection without attracting them closer to your home or yard.
Monitor and Refresh Bait Weekly
Check your wasp trap bait at least once per week to ensure it remains effective. Heat and heavy use can cause the bait to evaporate or spoil quickly, especially during hot weather or peak season. When inspecting, look for cloudy, moldy, or overly evaporated bait, which indicates it needs replacement—don’t just top it off. Remove any dead insects inside the trap, clean the interior thoroughly, and reset with fresh bait to keep attraction levels high. Placement also influences how often you need to refresh: traps in sunny spots or high-wasp areas will require more frequent changes. Typically, you should renew your DIY bait mixture every 1 to 2 weeks, but increase the frequency during hot spells or if the trap fills rapidly. For a more durable solution, consider using a top-rated commercial spray as a backup for quick knockdown in high-traffic zones. For larger pests like groundhogs, a live cage trap works best with sturdy construction and a sensitive trigger plate. Regular monitoring guarantees your trap stays attractive and effective throughout the season. Apply similar principles used for proper spacing and fixings to ensure your trap remains stable and secure against wind or heavy insect activity.
Keep Honeybees Away From Your Wasp Trap
Avoid sugar-heavy or honey-based bait when placing your wasp trap, as these attract bees. Instead, opt for vinegar or meat-based bait, which lures wasps without drawing in pollinators. Adding a few drops of dish soap to the bait breaks surface tension, ensuring trapped insects drown quickly. To minimize bee access, design your trap with a funnel entry that makes it difficult for bees to enter accidentally. Regularly check your trap and promptly remove any trapped bees to prevent them from lingering. Traps operate best on cold days when honeybees are less active. Clean the trap thoroughly after each use to eliminate lingering scents that could attract bees or interfere with bait effectiveness. This approach maintains the trap’s focus on wasps while protecting beneficial pollinators. If carpenter bees are a concern, note that wasp spray can kill them on contact, but it is not recommended as a solution for their nests.
Refill Your Trap With Cheap Pantry Swaps
You can keep your wasp trap effective using inexpensive pantry ingredients instead of specialized baits. Swap plain sugar water with a 1:1 mixture of apple juice or grape juice to extend refills and reduce costs. Adding a splash of apple cider vinegar enhances fermentation scent and discourages honeybees from entering. Incorporate jam, soda, or overripe fruit scraps to create a sweet, rotting odor that attracts wasps. During seasonal changes, start with sugar water when wasps seek carbs in late summer, then switch to fruit juice or vinegar blends in early fall. Always add a few drops of dish soap to break surface tension, causing wasps to sink instead of escape. Adjust your bait’s strength with vinegar or juice to keep the trap working without spending extra money. For a more powerful attractant, consider adding a pinch of sugar water similar to the bait used in electronic bug zappers. For a more targeted approach, mix in a small amount of squirrel bait trap attractant to draw in both pests.
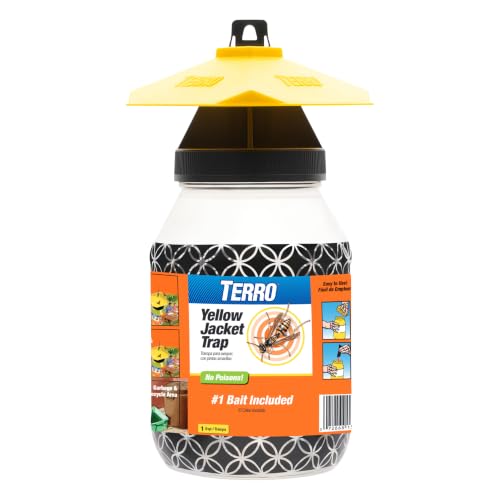
ATTRACT & KILL YELLOW JACKETS: Attracts and traps yellow jackets outdoors

Targets Yellowjackets – Lured in by our specially formulated attractant, yellowjackets fly in through the holes in the bottom of the trap and become trapped. Once inside, they die from dehydration.

【Reusable & Easy Setup】Simply unscrew the trap, add bait, secure the lid and hang it where needed. These wasp traps for outside are easy to clean and reusable, providing a cost-effective solution compared to disposable bee traps for outside
Why DIY Wasp Traps Beat Store-Bought
DIY wasp traps outperform store-bought options in cost, reusability, and bait flexibility. With just a recycled bottle, some tape, and pantry scraps, you can make a trap for almost nothing. This is a stark contrast to repeatedly purchasing commercial traps, which can become expensive over time. Reusing the same container from season to season reduces environmental impact by cutting down on single-use plastic waste.
You also gain control over the bait. For late-summer protein-hungry wasps, meat scraps work well. For sweet-toothed workers, sugar or jam does the trick. Swapping bait is simple and inexpensive, avoiding the need to buy new traps each time. You can also adjust placement, strength, and bait type easily, making your trap much more adaptable than store-bought options that lock you into a set formula. Practical, economical, and often more effective, DIY traps allow you to outsmart wasps using just scissors and an old soda bottle.
Know When to Remove a Wasp Nest
The best time to remove a wasp nest is in early spring. During this period, nests are smaller and the colony is less defensive, making removal much safer. As the season progresses into summer, nests grow larger, and wasps become more aggressive, increasing the risk of stings.
Focus on nests located near doors, walkways, patios, or play areas for removal. If a nest is in an undisturbed spot away from activity, it’s safer to leave it alone until late fall when the colony naturally dies off. In late fall, the wasps are no longer active, making removal easier and less risky.
Always schedule removal for dusk, dawn, or a cool, cloudy day. These times minimize wasp activity, lowering the chance of aggressive behavior. Avoid attempting to remove nests during hot sunshine midday, as wasps are most active then and more likely to sting.
For nests inside walls, in attics, or chimneys, professional help is essential. Also, seek expert assistance for large or highly active nests or if anyone nearby is severely allergic to stings.