

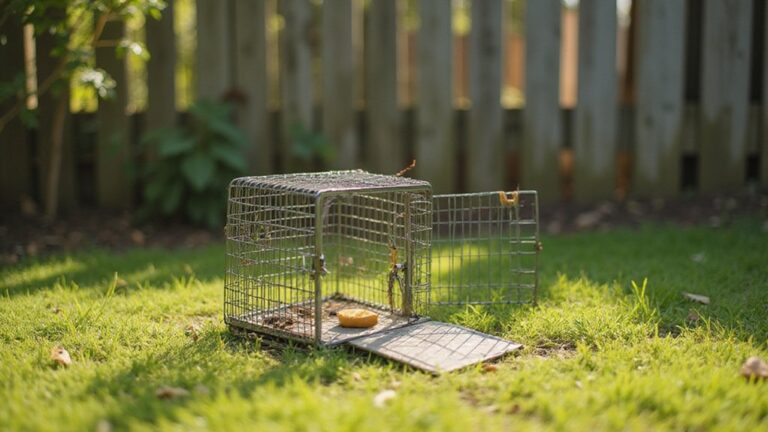
If you’re wondering how to set your Havahart trap effectively, you’re in the right place.
Properly placing and preparing your trap can make all the difference in safely and humanely catching unwanted pests.
With a few simple steps, you’ll be ready to go, ensuring your trap works smoothly and reliably every time.
Keep reading for clear instructions to master the process.
How to Pick the Perfect Spot for Your Havahart Trap
To pick the perfect spot for your Havahart trap, focus on where the animal actually moves and lives. Track its travel routes by looking for signs like footprints, droppings, or worn trails. Placing the trap near a den or burrow entrance increases your chances of success. Match your placement to the species’ habitat preferences; for example, set the trap along fence lines where many animals naturally travel. Seasonal changes matter too—raccoons’ routes to gardens in summer may shift in fall when they seek shelter. Choose the highest-activity area, such as near a feeder or shed, and position the trap on flat, stable ground. Use walls or fences as natural guides to the trap’s location and camouflage it with leaves or natural cover. For chipmunks, placing the trap directly along a worn trail will yield the best results. Avoid placing it in fully exposed, sunny areas or places with high foot traffic to prevent scaring away animals. For more durable exclusion around these travel routes, consider reinforcing the area with hardware cloth for squirrel prevention to block access after trapping. For targeting carpenter bees, consider also using the best bee traps designed specifically for their nesting behaviors.

HUMANE CAPTURE: This large live animal trap safely captures raccoons, cats, possums, and other small animals with a 1-door design that allows full entry before closing, reducing escape chances for effective pest control

HUMANE ANIMAL CAPTURE: The Havahart Easy-Set humane catch and release trap is ideal for rabbits, skunks, squirrels, and weasels
Prep Your Havahart Trap Before You Set It
To ensure your Havahart trap functions effectively, proper preparation before setting it is essential. Start by inspecting the cage thoroughly for any damage or deformities. Make sure the bait pan moves freely without sticking, as this affects trap sensitivity. Check that the door locks slide smoothly and securely to prevent accidental openings.
Test the trigger rods by pulling the looped rod outward while keeping it horizontal. If it sticks, clean or reposition it to prevent misfires. Set and trip the trap several times to confirm reliable operation; you can also use a pen inserted through the side to check that the doors close fully when triggered. The bait pan should sit level after setup, ensuring the bait remains steady and accessible. The trigger mechanism must hold the doors open securely until an animal trips it.
A bee suit is ineffective against wasp stings because wasps can squeeze through mesh gaps and sting repeatedly.
Handle the trap carefully, always wearing gloves to prevent scent transfer that could scare away animals. Ensure all components are properly aligned and that door locks are secure before opening the trap for baiting. Correct any bent wires or interference points that could hinder function. Keep the trap closed until all preparations are complete, and during conditioning, prop the door open so animals can get comfortable without triggering it. Lastly, verify the trap size matches your target species—an overly large interior reduces trapping effectiveness as animals may avoid the trap or escape more easily. For a standard setup, open both door locks and position the trigger rod under bait trigger for full activation. To further exclude voles from re-entering the area, consider pairing the trap with heavy-duty hardware cloth around garden beds. Using strong-smelling bait like peanut butter or tuna can improve your catch rate by attracting animals to the trigger pan.
Bait Like a Pro: Placement, Quantity, and Best Baits
Placement is crucial when baiting traps. For a one-door trap, put the bait behind the trigger plate, just beyond where the trap closes. Keep it away from the walls so the animal has to enter fully to reach the bait, increasing the chance of triggering the trap. For a two-door trap, position the bait in the center to direct the animal onto the trigger plates for maximum effectiveness. Always align your bait placement with your trap’s design to ensure proper functioning. For chipmunks specifically, reviewing a guide to choosing the best trap can help you select the right model for your situation. When dealing with wasps, consider using a bug bomb designed for enclosed spaces to eliminate nests effectively. For carpenter bees, using carpenter bee traps that are vetted for quality and performance can significantly improve your capture rate.
Using the right amount of bait is also important. Too little, and animals might not be attracted; too much, and they might reach the bait without triggering the trap. For mice, a tiny crumb or small dab near the entrance is enough. Peanut butter is a popular choice because it’s sticky and scent-rich; spread a thin layer on the trigger area for best results. When dealing with larger rodents like groundhogs or rats, opt for baits that require full entry, such as a small trail of bait leading inside the trap. This encourages them to fully commit, increasing your chances of success.

EFFECTIVE PEST CONTROL: Delivers reliable rodent management for home or commercial use. Designed to attract and eliminate unwanted pests quickly and efficiently for peace of mind.

ATTRACTS MICE AND RATS: Tomcat rodent attractant gel attracts both mice and rats and can enhance the effectiveness of any mechanical rodent trap

WHERE TO USE: Use these mouse and rat bait blocks indoors or outdoors; if applied where children, pets, and non-target animals may have access, bait blocks must be placed inside tamper-resistant bait stations
Set a One-Door Havahart Trap in 5 Steps
To set a one-door Havahart trap correctly, follow these five steps. First, place the trap on flat, stable ground in the animal’s travel path, ensuring the entrance is unobstructed. Check that the door opens and closes smoothly—this trap design depends on a clean, unobstructed drop for proper functioning. For the best results, choose a model made of heavy-duty galvanized steel to ensure durability and rust resistance over time. Using a sturdy tree guard as a shield nearby can help guide the animal directly toward the entrance. Unlike mosquito zappers, which are often ineffective because they kill mostly harmless insects rather than biting pests, this trap targets the specific animal causing the problem.
Next, open the door by lifting the lock and gently pushing the frame inward. Avoid forcing the hinge, as this could damage the trap. With the door fully open, pull the trigger rod forward and hook it onto the door mechanism. Rotate it carefully until it locks in place, making sure the trigger plate remains level. Rest the door against the trigger assembly and secure the lock on top. A sensitive trigger is essential because it relies on animal movement to activate the trap, and Havahart’s innovative technology promotes quick and efficient trapping.
Finally, inspect the setup from side and front views. Confirm the door will drop freely when the trigger is activated. Before walking away, double-check that the trap is stable and the door functions smoothly, keeping your hands clear of the trap’s moving parts.

Humanely Captures Animals – Ideal for trapping rabbits, skunks, and squirrels

Solution to Multiplicity: the package includes 2 humane rat traps, this offering is a solution to cover a larger area, ensuring maximum capture of unwanted rodent visitors, make your surrounding rodent free

【Automatic Multi-Catch Function】Designed with dual one-way entry doors, this humane rodent trap allows small animals to enter easily while preventing escape. The automatic cycle mechanism continues working after each catch, eliminating the need for constant resetting.
Set a Two-Door Havahart Trap in 5 Steps
To set a two-door Havahart trap effectively, follow these five steps. First, place the trap on level ground along a wall or a route the animal frequently uses. Positioning it here allows animals to access the trap from both ends, increasing your chances of success. Camouflage the trap with leaves or nearby natural cover to match animal behavior and reduce suspicion. For raccoons, using a bait like marshmallows or fish is recommended as part of effective raccoon trapping tips and safety guide considerations. This trap is designed for humane live trapping of squirrels, rats, and weasels, promoting ethical pest control. For larger pests like rabbits, it is also among the top options featured in live trap comparisons. This approach aligns with principles similar to how mosquito bits work by targeting specific pests without harsh chemicals.
Next, open both doors by unlocking them and pushing down the looped trigger rod until they stay fully open. This prepares the trap for bait placement and ensures it is ready to spring when triggered.
Then, set the trigger assembly by seating the flat end of the looped rod beneath the flat end of the bait pan. Keep the trigger mechanism level and stable to ensure proper function once bait is added.
Add bait near the back of the trap, not directly on the trigger plate. This placement encourages the animal to fully enter the trap and interact with the bait without immediately triggering the doors.
Finally, secure the trap by turning the door locks onto each door. Test the trap’s readiness by gently pressing on the doors with a pen—you want both doors to snap shut cleanly. Reset if needed until both doors trip correctly, ensuring the trap will operate reliably when activated.

Humanely Captures Animals – Ideal for armadillos, beavers, cats, small dogs, small foxes, groundhogs, opossums, and raccoons

HUMANE ANIMAL CAPTURE: The Havahart small 1-door live catch trap is designed for humane catch & release of squirrels, weasels, chipmunks, and similarly sized animals

Adjust Trigger Sensitivity for Fewer False Trips
Adjusting trigger sensitivity on your Havahart trap is key to avoiding false trips caused by wind or ground movement. To do this effectively, consider the size of the target animal. For small animals like squirrels, set the sensitivity higher so the trap responds to minimal contact. For larger animals such as raccoons, lower the sensitivity to prevent false triggers from minor disturbances. If your trap has a control knob, turn it toward less-sensitive to reduce false trips. You can also change the hook placement depth; a deeper engagement lowers sensitivity. After each adjustment, test the trigger by pressing the plate gently with a pencil to ensure it releases cleanly. Repeat this process, making gradual adjustments, until the trap only fires from genuine animal contact, not from wind, ground movement, or minor touches. For gray squirrels, using the recommended minimum trap size of 24″ x 7″ x 7″ ensures the animal fits without triggering the door prematurely on its body.
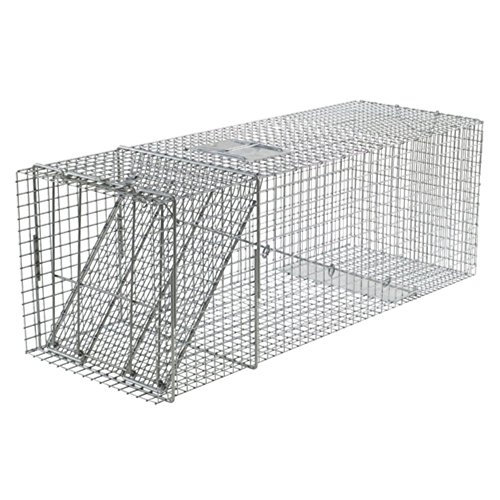
Best used for armadillos, beavers, bobcats, cats, dogs, foxes, groundhogs, opossums, and raccoons

HAVAHART 1-DOOR EASY SET LARGE ANIMAL TRAP
Common Mistakes That Let Animals Escape a Havahart Trap
Even a well-maintained Havahart trap can fail if you make basic mistakes that let animals escape. One common error is choosing a trap that’s too small—an overly compact trap won’t allow a raccoon or opossum to stay fully inside. These animals can snatch bait near the entrance and back out before the door drops. To prevent this, ensure the trap is appropriately sized for your target animal.
Placing bait correctly is critical. Never put bait right at the entrance; instead, position it behind the trigger to force the animal to fully enter the trap, reducing the chance of an escape. Customizing the trap for your specific target is helpful, but neglecting to check its size or secure the base against tipping can lead to escapes. Inspect all wires, latches, and moving parts for weaknesses. Make sure the locking bar engages completely each time; partial closures don’t count as a successful capture and allow animals to slip out, turning your effort into a free food giveaway. For persistent cases, live trapping is preferred over repellents to ensure removal.
How to Safely Release a Captured Animal
To release a captured animal safely and humanely, follow these steps carefully. Choose a release site with natural cover like brush or trees, and make sure the area is free of people and pets to prevent stress or injury. Before opening the trap, wear gloves and keep yourself behind it, pointing the opening toward the escape cover to guide the animal away from the trap safely. Open the door slowly to avoid startling the animal and step back to give it space to leave. Expect the animal to behave defensively; do not attempt to force it out if it resists. Wear protective gear to avoid bites or stings during the release process. Ensuring your trap uses galvanized chicken wire will prevent rust and prolong the tool’s lifespan for future use. When selecting a release site, ensure it has adequate natural cover to help the animal quickly hide from predators.
Inspect the animal visually for any injuries. If it appears healthy and unstressed, allow it to leave on its own. Never release animals that seem sick or severely stressed without consulting local wildlife authorities first. For small mammals, release them several miles away from your home to minimize the chance they will return. Timing the release right—at dusk for nocturnal animals or in the morning for diurnal ones—respects their natural activity cycles and increases their chances of survival.
Clean and Store Your Havahart Trap for Next Time
After releasing the animal, clean and store your Havahart trap immediately to ensure it’s ready for next time. Begin by removing all bait, droppings, and hair from the trap. Use freshwater and a mild, unscented detergent for eco-friendly cleaning—avoid harsh chemicals that may leave strong scents. Disinfect the trap with a 1:9 bleach solution, and leave it for 20 minutes before rinsing thoroughly to eliminate odors. For an extra layer of prevention against future pests, you can also make a simple DIY gnat trap using cheap materials like apple cider vinegar and dish soap. If you are dealing with indoor insects, consider using top bug bombs for apartments as an alternative pest control method.
Dry the trap completely with a scent-free cloth to prevent rust and avoid using strong-smelling soaps that could repel animals. Check for any damage or rust, and make sure the door and trip plate operate smoothly. Lubricate only if necessary, and choose a food-based oil to steer clear of strong scents. For storage, keep the trap in a dry, protected area, like its original box or on a wall shelf, away from damp spaces such as basements. Handle it with gloves to reduce human scent transfer, helping maintain the trap’s effectiveness.
Troubleshooting 101: When Your Havahart Trap Won’t Trip
If your Havahart trap won’t trip, start by performing thorough trap maintenance. Clear any debris, dirt, or bait residue from the trigger path to ensure smooth movement. Press the L-rod and trip plate by hand; they should move freely without resistance. Next, inspect the trigger mechanism. A bent rod can prevent the door from releasing. Gently straighten it with pliers, but replace it if it’s severely damaged. If the trap still doesn’t activate, adjust its sensitivity. For lighter animals, add a washer or small pebble to the trip plate to make the trigger more responsive. Ensure the trap sits level on the ground, as uneven surfaces can cause misalignment of the trigger. Finally, manually test the trigger to see if the door engages when pressed. If it doesn’t, worn springs or faulty latch parts are likely the cause, and replacing these components is more effective than repeatedly bending them. Trigger mechanism failure can often be traced to worn or damaged wood that prevents the latch from holding properly.