

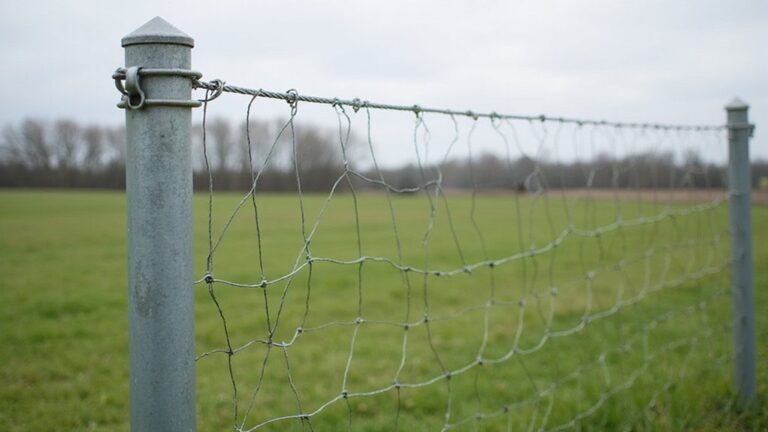
Struggling to attach chicken wire securely to your T-posts? A few simple steps can make the job faster and more reliable.
Using the right fasteners and spacing methods, you can prevent sagging and ensure your fence stays tight and strong.
Keep reading for easy tips on how to do it right the first time.
Tools and Materials Needed for Attaching Chicken Wire to T-Posts
To attach chicken wire to T-posts effectively, you’ll need a specific set of tools and materials. For the fence line, gather galvanized steel T-posts and chicken wire that matches your desired height and mesh specifications. It’s wise to include extra wire for overlaps and corners, as well as tensioning wire for long stretches to keep the fence taut and secure. Choosing the correct gauge is crucial for ensuring the wire’s strength and durability over time.
Your fastening hardware should consist of T-post clips, which hold the wire to the posts, and poultry staples if you’re attaching to wooden supports. Essential cutting and measuring tools include wire cutters for trimming the wire neatly, a tape measure for precise length and height setup, and string to mark straight lines along the fence line.
Installing the posts requires a T-post driver or sledgehammer, and a shovel may be necessary for preliminary ground preparation or additional support. Don’t forget to use gloves for hand protection during handling and fencing pliers for wire wrapping and tightening, ensuring a secure and durable fence. Since voles can squeeze through surprisingly small gaps, inspect your fence line for any loose sections or holes before finishing the job. However, note that standard chicken wire may not stop determined rabbits, as they can chew through chicken wire if the mesh is too thin or poorly secured.
These tools and materials guarantee that your chicken wire fence will be both strong and visually neat, creating an effective barrier against wildlife while maintaining a tidy appearance.
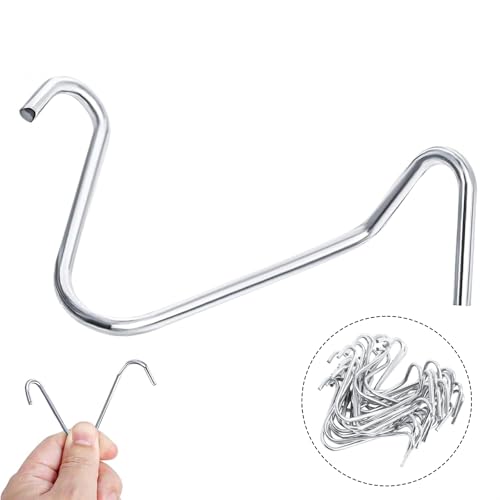
✅9 Gauge Galvanized Steel Construction: Made from heavy-duty 9 gauge galvanized steel, these T-post clips are strong, durable and suitable for outdoor fencing applications. The galvanized finish helps resist rust and corrosion, providing reliable fastening for farm fences, garden fences, livestock enclosures and everyday fence repairs.

Sufficient Quantity: there are 250 packs T-Post clips in our package, sufficient quantity for your daily use and replacement!

▦【Upgrade T Post Clips Kits】100 pieces sufficient quantities of T-post fence clamps, sufficient of handling multiple fencing and construction projects simultaneously without requiring additional purchases, meeting your daily usage and replacement needs. Our drill chuck tools are designed for enhanced compatibility, enabling more effortless and efficient operation. Accelerate installation and save labor on large-scale projects like farms, Livestock Fencing, and more.
The Fastest Way to Attach Chicken Wire to T-Posts With Cable Ties
Using cable ties is the fastest way to attach chicken wire to T-posts because you don’t need special clips or tools. Start at one end post, unroll the mesh along the fence line, and hold it taut against the post. Thread UV-resistant cable ties through the holes in the wire or wrap them around the post itself. Work from post to post, maintaining the same pattern and spacing the ties about 15 centimeters apart for a secure hold. Once each tie is tightened, trim the excess tails to prevent snagging. Begin by inspecting the entire fence for loose sections and reinforce corners first to ensure stability. Unlike owl decoys, which often fail to deter persistent rodents, this physical barrier provides reliable exclusion, as a bug bomb is also ineffective for larger pests like mice. For even greater stability, apply the same principle of adjusting the pressure used in pump sprayer settings to ensure the mesh is uniformly tight along each post. With this method, you can quickly create a taut, even fence, ideal for wildlife barriers or decorative fencing where speed is essential. For even greater stability, arrange cable ties in a crisscross pattern when connecting overlapping sections.

FEATURES - Metal zip ties made of 304 stainless steel. These heavy duty zip ties are 4x stronger than regular plastic zip ties. These stainless steel zip ties mean they are High temperature resistant, Cold resistant, Rust and Corrosion resistant. Unlike traditional plastic zip ties, these heavy duty metal ties won't break down by uv light in the sun like normal plastic zip ties.

Made with UV resistant industrial strength 6/6 Nylon

Heavy Duty Strength for Tough Jobs: Our 100-pack of 8-inch black zip ties is built to last with a 120-pound tensile strength, making them perfect for both indoor and outdoor projects. Whether you're securing cables, organizing tools, or handling industrial tasks, these durable ties won't break under pressure, ensuring reliable performance every time. Ideal for electricians, landscapers, and DIY enthusiasts.
How to Use Wire Clips for a Stronger Hold on T-Posts
To secure chicken wire firmly on T-posts, use wire clips instead of cable ties for a stronger hold. Position each clip just above a post stud, hook one end over the wire, then wrap the other around the T-post flange. Twist the clip tightly with fence pliers to ensure a snug fit. Always aim for full, compact twists rather than loose wraps, which can slip off. Place clips every 12 inches along the fence line for optimal stability. When working around corners, bend the mesh around the post before clipping for a cleaner, more secure attachment. A screwdriver can be used as an improvised technique to twist the clip into place when pliers are unavailable or difficult to maneuver. Choose galvanized or coated clips to prevent rust and extend the lifespan of your fence. For sprawling fence lines, more clips improve durability similar to how a sturdy backpack sprayer rack supports heavy equipment. For optimal results, consider the best bee trap designs that also prioritize secure, rust-resistant fasteners. Unlike wasp spray, which is ineffective against termites and poses safety risks, wire clips provide a durable mechanical hold that does not require hazardous chemicals.

For attaching non-electrified wire to T-Posts,easy to assemble, environmentally friendly, waterproof, galvanized surface, long service life

✅9 Gauge Galvanized Steel Construction: Made from heavy-duty 9 gauge galvanized steel, these T-post clips are strong, durable and suitable for outdoor fencing applications. The galvanized finish helps resist rust and corrosion, providing reliable fastening for farm fences, garden fences, livestock enclosures and everyday fence repairs.

🏡【Premium Quality】T-Post Clips fits T-Posts/U-Posts up to 1.33 lb/ft. Constructed of heavy-duty, 9-gauge galvanized steel with a hot-dipped zinc finish to withstand the harshest outdoor conditions, they are rugged and resistant to corrosion or rust and will not break, warp or bend.
Space T-Posts Correctly for a Strong, Sag-Free Chicken Wire Fence
Spacing T-posts 8 to 10 feet apart is ideal for most chicken wire runs to prevent sag and keep the fence taut. This range strikes a balance for lightweight wire, as shorter spans resist mid-panel flexing and maintain a straight, firm line. If you set posts beyond 12 feet, expect more slack and a greater risk of sagging, especially when the ground isn’t perfectly flat. For berry patches, using specialized bird netting provides an additional layer of defense against fruit loss. For gardeners with multiple small plots, using chicken wire options designed specifically for pots can simplify protection around individual containers.
Terrain differences influence your spacing choices. On slopes or uneven soil, reduce the distance to about 8 feet so the fence can follow the grade without loose sections. Soft ground or loose soil also warrants closer posts to maintain alignment and tension. Pay special attention to corners and gate areas—these spots need extra support, so spacing posts more closely there prevents leaning and maintains stability.
Your post spacing directly impacts sag risk. While 10-foot intervals can work for lighter fencing, 8 feet offers the firmest and most straight fence line. Early spacing decisions are crucial; choosing too wide a gap now means more re-tightening later. For additional pest prevention strategies, consider that UV light traps effectively draw and capture mosquitoes.

【SIZE】Pack of 10.This fence post is composed of two sections. One section measures 4 ft and the other is 3 ft. When installing, please first insert the 4 - ft section into the ground for fixation. After that, use screws to securely attach the 3 - ft section on top. The height of each fence post is 7 ft in total, of which 1 ft is buried underground, perfectly suitable for 6 ft welded wire.

Heavy Duty Posts: These t posts are made of 0.08" (2mm) rugged steel to ensure the fencing post is stable and durable

Package Including: 8 pcs of 4.8 feet fence post, green color, light duty. These metal posts for fence are sturdy with U-shaped design and durable.
How to Tension Chicken Wire to Prevent Sagging Between Posts
To tension chicken wire and prevent sagging between posts, start by securing a tension wire between the end posts with firm wraps. This heavy-duty wire helps carry the load, reducing reliance on staples alone. Proper placement of stakes and alignment of posts are essential—misalignment can cause uneven pull and lead to sagging later.
Next, stretch the chicken wire by hand or with a stretcher from one end to the other, aiming for a slight bounce rather than a loose dip between posts. Be careful not to over-stretch, as this can tear the mesh. As you fasten the wire, place staples every few inches in areas where tension is critical. Recheck the tension frequently because the wire can relax after each fastening. For consistent performance, choose sprayer wand tips that match the viscosity of your coating to avoid clogs and uneven spray patterns. Pond netting varieties differ in mesh size and material, so select one suited to your specific needs for durability and debris exclusion. Using string twine woven through the wire at regular intervals and tied off tightly provides additional reinforcement to prevent sagging over long spans.
Near corners and ends—where pulling forces are strongest—add extra fasteners to reinforce tension. For longer runs, brace your terminal posts to withstand inward pull and maintain tightness over time. Regularly checking and adjusting tension during installation ensures a firm, sag-free fence that endures. For extra security, wear a thick bee suit to protect against stinging pests like wasps while working.
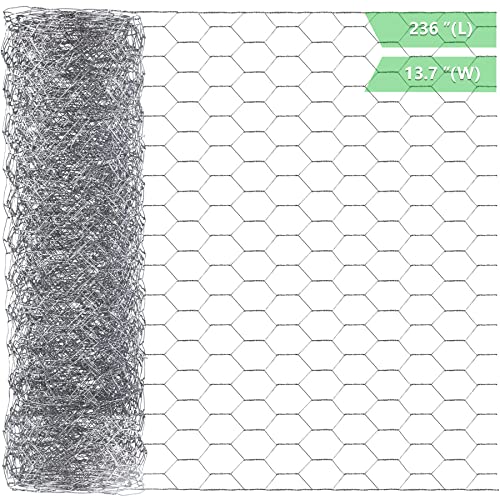
【Large Size】Each mesh is 13.7 inch (width) x 236 inch (length) / 0.35 m x 6 m, 0.8 x 1.38 inch mesh. Wire fencing is long and wide enough to enable you to cut off any shape that you need

【Larger Size】 You will receive a roll of chicken wire mesh, which measures about 16 inches x 13.1 feet, longer than others, 1 x 0.63 inch fine mesh, wire diameter: 0.9mm, perfect chicken wire for floral arrangements and craft projects

High-Quality Anti-Rust Process This hardware cloth is made from high-strength low-carbon steel wire, combining excellent strength with flexibility. After precision welding, the entire product undergoes a premium anti-rust treatment—hot-dip galvanization—with special reinforcement at all seams and corrosion-prone areas to ensure uniform, dense coating and outstanding rust resistance. This process grants the product superior weather resistance, making it an ideal choice for wire mesh fencing and long-term outdoor applications.
Common Mistakes That Weaken Your Chicken Wire Fence
Even a well-tensioned chicken wire fence can fail quickly if you overlook common installation mistakes. Using thin, low-quality wire leads to early failure zones, so choose heavier gauge mesh that can withstand tension and weather. Keep T-posts spaced no more than 10 feet apart; going beyond this distance invites sagging and instability. For extra reinforcement, use support structures like braced corner posts instead of relying solely on T-posts. Never leave the bottom of the fence unsecured—bury it underground or pin it down to prevent digging animals from slipping underneath. Corners and gates are weak points; reinforce them with sturdy framing to prevent buckling under tension. Avoid using regular iron nails, as they rust over time and weaken the structure; instead, prefer galvanized staples that resist corrosion. Fold over any cut edges of wire to prevent snagging and injury. If aesthetic appearance matters to you, consider color options for your wire that blend seamlessly with your landscape. Every fastener and post choice plays a crucial role in the durability and effectiveness of your chicken wire fence. For additional protection against burrowing pests, you can apply a step-by-step guide on how to trap a skunk that digs near the fence line. If you need to temporarily secure the area without a trap, use humane handling techniques to safely guide the animal away from the fence.