


Struggling to catch gophers without much success? Learning how to set a Gopher Hawk trap properly can make all the difference. With a quick and straightforward setup, you can increase your chances of catching those pests efficiently.
Once you find a fresh tunneling mound, setting the trap correctly is key.
Keep reading for a simple step-by-step guide to help you get started and stay consistent in your trapping efforts.
Spot an Active Gopher Tunnel Fast
To spot an active gopher tunnel quickly, look for fresh mound patterns. Newly dug soil piles—often appearing overnight in a line or cluster—indicate recent digging activity. These mounds have a fan shape with loose, dark, damp soil, unlike older, crusted dirt. Check the flat side of the mound for a firm, off-center plug, which marks the entrance and shows how the tunnel is functioning. A group of three to five fresh mounds suggests the gopher is actively expanding its burrow system. Size isn’t a reliable indicator; focus instead on how recent the soil appears. Feel the soil with your fingers—if it’s soft and spongy, the tunnel is live. Flatten old mounds and revisit the area after a day to see if new openings have appeared. Nearby bare patches or wilting plants also point to recent activity, helping you identify the active tunnel route more efficiently. After removing the gopher, you may want to cover the cleared area with heavy-duty netting to block future intrusions. Similar to how bug zappers attract and eliminate mosquitoes, identifying fresh gopher mounds is the key to pinpointing where to place your trap. For long-term exclusion, consider installing chicken wire around garden beds after trapping to prevent gophers from returning.

Key Features: GopherHawk Single Trap only, does not include the Wedge & Probe tool Gopher and mole trap A quick and humane kill Stainless steel straps Professional grade Designed, engineered and assembled in the USA No digging, no baiting, no poison Easy disposal of pest Above ground catch indicator No digging or touching the soil or the pest GopherHawk dimensions are 20” X 1 ½”
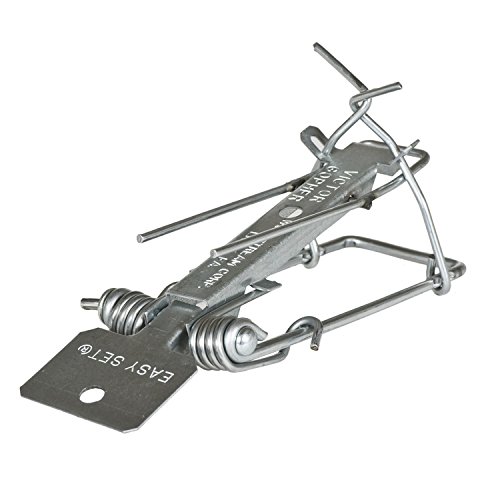
DESIGNED FOR GOPHERS: The pincher-style trap is designed to be placed directly in runways or mound openings to effectively eliminate gophers inside their tunnels
Open the Tunnel Without Collapsing the Run
To open a gopher tunnel without causing a collapse, start by creating a small access hole that’s just wide enough for the trap. Use a small trowel or probe to carefully break into the roof without enlarging the existing tunnel walls. This minimizes the risk of caving in. Focus on cutting a clean, straight entry into the main run, avoiding forcing a larger opening or undercutting the sides. For soil preservation, only remove the soil plug directly over the tunnel and clear loose dirt gently with your hands or a spoon. Keep the opening aligned with the tunnel’s natural course rather than widening or distorting it. In sandy soil, make the hole even smaller to prevent cave-ins. Once the tunnel is exposed, do not pack soil back into the opening. Instead, block out light with a cover like sod or cardboard to maintain the roof’s integrity without applying pressure that could cause collapse. As with other traps, you should set the trap without disturbing the entrance further to avoid spooking the animal. For best results, compare this approach with top bee traps to see how different pest solutions target tunnel structures.
Position the Trap at the Right Depth
Once the tunnel is open and stable, position the trap at a depth of 6 to 12 inches from the surface. Place the trap’s jaws flush with the tunnel floor, ensuring it does not hang suspended above. The goal is for the trap to sit snugly, becoming part of the floor so the gopher moves through naturally. Proper alignment means the jaws and trigger follow the tunnel’s path directly, increasing your chances of a catch. Always set the trap with safety precautions such as wearing gloves and using a setting tool to avoid injury. For best results, use fresh bait inside the tunnel to entice the gopher toward the trigger. After catching, handling the animal with a humane and legal approach ensures compliance with local regulations.
Refer to the actual tunnel floor, not the soil surface, when gauging depth. Slide the trap just inside the opening for optimal placement. Slight adjustments in depth help maintain correct alignment; the trigger should hang low enough to intercept the gopher. Verify that the trap sits level, with jaws touching the tunnel walls, for a direct encounter.

PROFESSIONAL MOLE CONTROL: Trusted by experts, this trap is designed for effective mole and gopher removal. Works as a reliable gopher box trap for lawns and gardens.
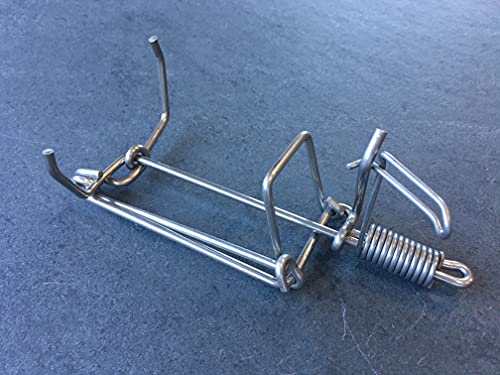
Stainless steel--Won't lose effectiveness due to rust

Easy to Install & Use – No tools required. Simply place the trap in the gopher tunnel and activate it for fast, effective results
Set the Gopher Hawk Trap Safely
To set the Gopher Hawk trap safely, start by protecting your hands and the trap. Insert the unset trap into the base of the tunnel before engaging the mechanism. Use your flat hand to brace the endcap for leverage, then pull the black tube upward until it locks into place. Never push down on the tube, as this can bend straps and weaken the trap’s safety features. Keep your fingers away from the trigger area and straps at all times to avoid injury. When the trap is correctly set, the yellow indicator is not visible, confirming it is locked and ready. Much like how a bee suit creates a barrier against stinging insects, this trap uses a protective mechanism to keep your hands away from the trigger. Unlike some yard chemicals that are highly flammable when exposed to heat or sparks, this trap relies on a purely mechanical design with no fire risk.
Use controlled movements: stand clear of the trap’s front, maintain a steady stance, and only hold stable, external parts of the trap. If you encounter any resistance that feels abnormal, do not try to force it. Confirm that the trap is securely locked before leaving it in place. Proper setup is essential to prevent damage to the trap and reduce the risk of failure.
Easy set design and fully assembled

Unlock superior effectiveness in mole catching with our professional-grade solutions! Our scissor-style traps have earned widespread praise for their rapid, high-performance mole captive capabilities. Numerous customers have achieved consistent, multi-mole capture results, establishing these traps as the premier selection for reliable and powerful mole control.
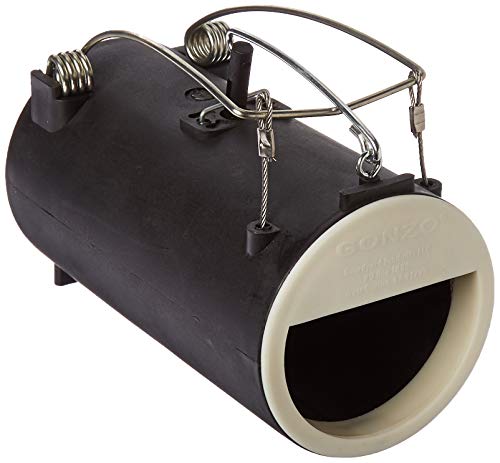
Easy-to-Use: The Dead-End trap is an effective mole killer and gopher killer. Just follow the “EASY-TO-FOLLOW ILLUSTRATED INSTRUCTIONS" – no mess, no hassle, and you'll appreciate its usability time after time.
Keep Your Fingers Clear When Setting
Keep your fingers out of the strap area entirely—that’s the non-negotiable rule for setting a Gopher Hawk trap. The trap straps are the primary hazard, so never position your fingers between them or near the trigger. To set the trap safely, brace the endcap with a flat hand and pull straight up on the black tube. Avoid pushing downward or using your fingertips; pulling upward keeps your hands clear of the straps. Before setting, insert the unset trap into the tunnel and ensure all body parts stay away from the opening. To deactivate, strike the black tube to release tension instead of using your fingers. Always handle the trap only at designated contact points and avoid rushing movements that could bring your fingers dangerously close to the strap area. Using a screwdriver or similar tool to spring the trap is a safer method that prevents injury from the pendulum mechanism. Unlike the targeted approach needed for snakes, this trap’s design relies on mechanical pressure to dispatch pests instantly. For a similar safety perspective, remember that mosquito dunks are tested to leave tadpoles unharmed, offering a non-toxic alternative to chemical sprays. To maintain the trap’s reliability, regularly inspect and clean the mechanical components to prevent rust or debris from interfering with the trigger.
Check Your Gopher Trap: Timing and Actions
Check your gopher traps every 24 hours to maintain activity and maximize your catch rate. Daily inspections prevent wasted effort and help you stay ahead of the gopher’s movements. The best time to check is early morning when tunnel activity tends to be freshest after overnight digging.
Evaluate signs of activity to decide your next steps. A trap that has triggered but contains no catch suggests the gopher may have approached from behind. Dirt-packed traps indicate recent tunnel use, making them prime spots for further action. If a trap remains untouched for 48 hours, relocate it to a new mound or tunnel system with fresh activity. Focus on sets near new mound activity rather than old, abandoned tunnels. Understanding how live traps work for yard pests can help you better anticipate gopher behavior and improve your trap placement. For similar pest control considerations, wasp spray is not effective against ants or roaches due to differences in insect biology.
Only reset traps that show continued signs of activity. If a trap has been sprung but no gopher is caught, reposition it deeper into the tunnel to increase chances of success. Move traps after two days of no activity unless fresh digging or buried dirt confirms ongoing use. Adjust check frequency based on trap type: in warm weather, check live traps every 4 to 6 hours to prevent heat stress. After removing a trap, close off unused tunnels to keep your trap line effective.
Handle a Fired Trap With or Without a Catch
If a trap has fired, treat it as active regardless of whether it caught a pest or not. Carefully remove the trap from the ground by gripping the spring end, avoiding the black tube to stay safe. If the trap caught an animal, brace the endcap and pull back on the black tube until it is free. Shake the animal loose by pressing or pulling the spring, then clear the mechanism before resetting or reusing. For a trap that fired without a catch, lift it by the spring end and deactivate it by striking the black tube against a solid surface. Always check for debris or tunnel collapse before re-baiting and setting the trap again, and ensure the black tube locks properly for effective operation as per the setup instructions. A no-catch fire simply indicates the trigger tripped; clear the trap and it’s ready for another placement. To ensure the trap holds securely, use sturdy staples driven at the proper spacing, as insecure fastening can weaken the trap’s grip on the tunnel. When re-baiting, select a fresh bait that is appealing to the pest to increase the likelihood of a catch. For armadillos, positioning the trap directly in their active tunnel path improves the chance of a successful capture.
Move to a New Spot and Reset
To move to a new spot and reset, start by locating a fresh active tunnel. Probe about 6 to 10 inches from a new mound, preferably between two mounds. Look for a point where resistance suddenly drops, indicating the tunnel’s base. Accurate tunnel identification depends on fresh soil disturbance—old mounds won’t provide reliable signs. Use your wedge to reopen the tunnel, stirring soil until you reach the bottom. Avoid making the hole larger than necessary. For optimal results, consider using the best bait to attract yellow jackets in other pest control scenarios. Additionally, reflective tape for bird deterrent can be a cost-effective solution for keeping birds away from garden areas.
Next, insert the unset trap properly. Orient the trap’s opening in the same direction as the tunnel. Then, brace the endcap and pull the black tube until it locks into place—do not push down on the tube. If it refuses to lock, strike it against something solid to secure it, a simple strike mechanism that ensures correct operation and reset. Leave both the trap and hole in place. Check frequently, and if the spot remains inactive, move on and repeat the process until you locate a productive runway.