

If you’ve spotted a wasp nest and want to clear it safely, knowing the right time and method is key.
The best approach involves timing your spray for when wasps are less active, typically at dawn or dusk.
Using the right tools to target the nest thoroughly is important.
With some simple precautions, you can tackle the task without putting yourself at risk.
Keep reading for all the details.
When Is the Best Time to Spray a Wasp Nest?
The best time to spray a wasp nest is at dawn or dusk. During these times, wasps are far less active because most of the colony is inside the nest. Cooler temperatures slow them down and decrease their defensive response, making it safer for you to approach. Nighttime spraying ensures you can target the entire colony, not just the foragers outside. Avoid spraying during warm, sunny hours when wasps are highly aggressive and foraging. Dry, calm weather also enhances safety by reducing spray drift and unnecessary disturbance. Early spring or late spring are ideal times because nests are smaller, making treatment easier and more effective. Using simple build process techniques similar to those for squirrel-proof feeders can help you construct a protective barrier for your spray area. Remember, never spray during midday when wasps are most energetic—they are more likely to react defensively, increasing your risk of stings. For protecting nearby plants, consider using bird netting for strawberries to shield them from wasp activity. A well-designed bee trap can also help manage carpenter bees that are attracted to untreated wood near the nest site.
How to Spray the Nest for a Full Kill
To spray the nest for a full kill, you must thoroughly saturate it from the entrance inward. Light surface spraying is ineffective; instead, aim directly at the opening and direct the insecticide deep into the void. Use spray techniques like a coarse or pin-stream application to ensure the product reaches the interior rather than just the outside surface. This is especially important for nests with heavy insulation, where the colony may be hidden behind thick layers of material. Spray continuously for several seconds until you see runoff, indicating thorough coverage. Foaming sprays are effective at blanketing the exterior and blocking exits. Bee suits do not reliably shield against wasps, as wasps can sting through most fabric layers. If activity persists after 24 hours, retreat and reapply. Inadequate coverage is the leading cause of unsuccessful exterminations, so invest the time to saturate every part of the nest for a complete kill. For safe application, the product can be sprayed from up to 22 feet away due to its electrically non-conducting nozzle. For protecting nearby water features during treatment, consider using pond netting to catch falling debris and chemicals.
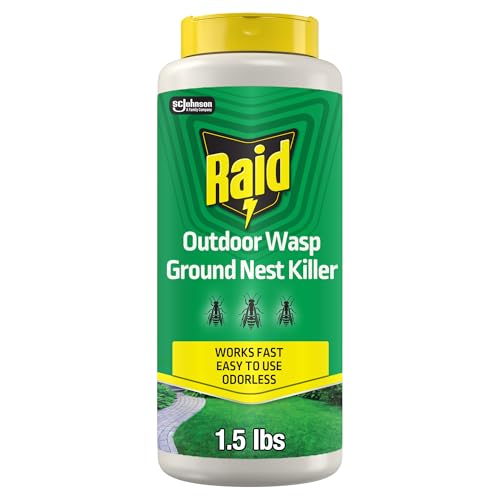
Ready-to-use, wasp nest killer, uses a waterproof dust that kills insects for up to 8 months

Raid Max Foaming Wasp & Hornet Killers fast coverage foam kills the entire wasp nest

Two 14 oz cans of Raid Wasp & Hornet Killer Spray kill flying, stinging bugs on contact, including paper wasps, yellow jackets, mud daubers, bald-face hornets, and more
What Gear Do You Need Before You Start Spraying?
Before you approach a wasp nest, you’ll need the right gear to minimize sting risk and ensure a safe, effective treatment. Start with protective clothing: long sleeves and pants made of tightly woven fabric, tucked into sturdy boots and gloves. Thick leather gauntlet gloves provide better sting resistance than thin or fabric options. Face protection is critical; goggles shield your eyes from spray drift, while a beekeeper veil or hood covers your scalp and neck. Sturdy boots with sealed ankle gaps reduce vulnerability during movement.
For added safety, include a face mask or respirator to protect against pesticide fumes. Using a headlamp keeps your hands free if you’re working at night, and a hard hat helps guard against overhead nests. Full-body coverage and sealed clothing entries help prevent wasps from entering and defending their territory. Remember, the goal is to minimize exposed skin and create a barrier against defensive stings.
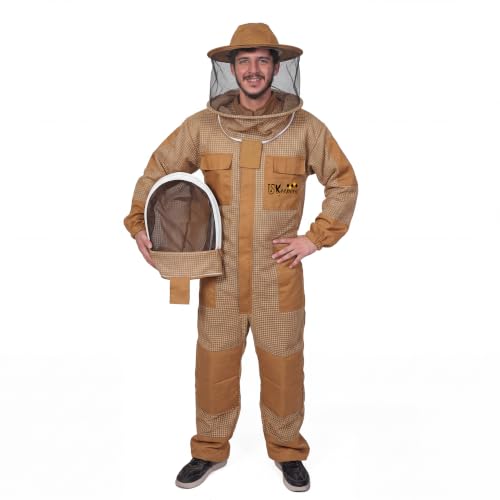
🐝【LIGHTWEIGHT & VENTILATED】🐝 USKeepers Ultra Ventilated Three Layer Bee Keeping Suit is made with three layers of high quality Polly cotton mesh fabric that is extremely lightweight, comfortable and protective. The three intersecting layers of mesh allows breezes in and sweat to evaporate out. The material is Durable and Excellent quality that lasts for years. The three layers of raised fabric sit high and keep bees away from skin.

Beekeeping Hat and Gloves Set: the set includes 1 pair of beekeeping gloves and 1 beekeeping veil hats. Designed for reliable protection and comfort, this set meets your daily beekeeping and outdoor needs

✅ Effortless & Comfortable Fit: These beekeeper pants are designed with elasticized cuffs and a front zipper for quick adjustments and a secure fit. The lightweight, breathable design ensures full comfort during long hours of beekeeping, allowing you to move easily and work efficiently.
How to Choose the Right Spray for Aerial vs. Ground Nests?
For aerial nests, a long-range aerosol or foaming spray with a reach of at least 15 to 20 feet is essential. These nests are often exposed under eaves or on branches, so a strong stream allows you to stay safe from the nest while effectively targeting the entrance and surface. Foam formulations coat the nest, enabling faster knockdown by sealing the surface and entry points.
Ground nests require a different approach. Since these nests sit below surface level, the spray must penetrate into the cavity. Insecticidal dust is often the best choice because it settles deep into the nest and reaches hidden insects. Some pressurized sprays can also work if you can direct the jet precisely into the opening. Surface coatings are ineffective here; penetration into the nest interior is key.
Always choose your product based on the nest’s accessibility. Use dust for hidden, wall void, or concealed nests, and foams for visible, exposed nests. Effective nozzle control will improve accuracy and ensure the product reaches the intended target. Be sure to follow the label’s instructions for the specific nest type you’re treating.

BLANKETING FOAM FORMULA: Kills listed pests by contact, including wasps, hornets & yellowjackets

FOAMING AEROSOL: Foam expands to where insects live – extension tube lets you spray into hard-to-reach areas

Sprays up to 27 feet
How to Approach a Wasp Nest for Spraying Without Provoking an Attack?
To approach a wasp nest without provoking an attack, move in from the side or back rather than directly in front, as this is where their strongest defensive response occurs. Detect the nest at dusk or early morning when wasps are less active because cooler temperatures keep them inside. Use minimal light to avoid alerting them. Wear long sleeves, tuck pants into socks, and protect your face with a mask or goggles. Keep your body angled away from the entrance and avoid looming or staring directly at it. Move slowly and deliberately, avoiding sudden gestures or swatting motions. Stay at your spray’s maximum range, around 15 to 20 feet, to minimize risk. Before starting, ensure you have a clear retreat route. Remember, you’re treating the nest, not crowding or threatening it.
What to Do Immediately After You Spray the Nest
After spraying, retreat immediately to a safe distance and wait at least two hours before re-entering the area. This minimizes your exposure to lingering stings and residual pesticide drift. Keep children and pets away during this time, and avoid inspecting the nest right away—wasps may still be defending it. Observe from afar for signs of entry or exit traffic; if there is no movement, it indicates the treatment was successful. Remember that residual insecticide can still affect returning foragers, so do not approach the nest even if it appears quiet. For persistent outdoor issues, consider using outdoor mosquito traps as a complementary pest control method. You can also build a simple DIY coyote decoy using cheap materials to deter larger pests from the area.
If after 24 hours wasps are still entering and leaving, their nesting activity has not stopped, and you will need a second application. Attempting to remove the nest prematurely may provoke defensive stinging from hidden survivors. Instead, continue to monitor from a safe distance and wait patiently. Your task now is to remain cautious and patient rather than inspect the nest too soon.
How to Tell If a Sprayed Wasp Nest Is Safe to Remove?
Waiting at least 24 hours, ideally 48 hours, after spraying a wasp nest is crucial to determine if it is safe to remove. During this period, perform a careful inspection from a safe distance. Observe for any movement of wasps entering or leaving the nest over a full observation period of at least 10-15 minutes. Lack of activity suggests the nest is likely dead or inactive. Also, check if the nest appears dry, quiet, and shows no signs of buzzing or wasp movement. The presence of dead or weakened wasps nearby can indicate the spray was effective.
Before attempting removal, wait until daylight when temperatures are higher, as wasps are more active and easier to observe. Always wear protective gear such as gloves, long sleeves, and a veil, and use a long-handled tool to minimize risk. If you notice any movement or life signs during your inspection, wait longer or consider calling a professional. Remember, always follow the instructions on the aerosol product label, especially regarding timing, to ensure safety.
Avoid These Wasp Spraying Mistakes
Mistiming your spray can undermine the entire wasp control effort. Spray during midday when wasps are most active, and you’ll mostly target foragers outside the nest, leaving the colony core intact. If you spray too early or too late, the queen may remain unharmed, and the colony can rebuild. Proper equipment maintenance is crucial—check your sprayer’s nozzle and pressure before starting to ensure effective delivery. Many homeowners overlook this step, leading to poor coverage and wasted product. For those dealing with ground pests, castor oil repellents can also offer a non-toxic alternative for voles in the yard. However, unlike such repellents, coyote urine is not recommended for pest control around humans due to potential health risks from handling concentrated animal waste.
Nest concealment is another common mistake. Only spraying the visible opening leaves secondary entrances and hidden brood chambers in walls or ground nests untouched. Be thorough in your approach. Stand slightly to the side of the nest and aim your spray at the entry hole; avoid spraying directly underneath or randomly. Using the correct product for the type of nest is essential—over-the-counter sprays often fall short against large or well-established colonies. Lastly, always read the label for the product’s range and contact time. Failing to adhere to these instructions can just provoke the colony without actually eliminating it.

BLANKETING FOAM: Foaming aerosol kills listed insects by contact.

FAST KNOCKDOWN: Kills wasps, hornets, yellow jackets and mud daubers

KILLS BY CONTACT. Proven to work and easy to use, this aerosol spray is designed for quick kill and fast knockdown of wasps. With a 15 feet long distance jet spray, it kills wasps, hornets, and yellow jackets. Also treats open-faced hives.
When to Call a Pro Instead of Spraying
If a nest exceeds the size of a tennis ball, it’s best to call a professional. Generally, if the nest is large or aggressive, attempting DIY removal becomes too risky. Nests hidden inside walls, ceilings, or attic spaces are especially dangerous because you can’t safely reach them. Yellow jackets and bald-faced hornets are notorious for their aggression, making DIY efforts unsafe once the colony reaches a significant size.
If you notice more than 20 wasps gathered around the nest or hear buzzing from vents or walls, it’s a clear sign to stop and seek professional help. Allergies within your household elevate the stakes, as even a single sting can cause a serious reaction. Nests located near doorways or busy patios pose additional hazards, since you risk disturbing the colony repeatedly. If previous attempts to eliminate the nest have failed, the colony becomes more defensive. Once stung, the colony’s response intensifies, increasing the danger for anyone nearby. For those dealing with fruit fly issues instead, fruit fly traps offer a completely different, safer approach to pest control. It’s safest to call a professional before the risks escalate further.

【Efficient 3-Blade Scraper】This wasp nest removal tool is fitted with a sharp triple-edge blade to slice through wasp, hornet, and mud dauber nests effortlessly. (Warm Reminder: The blade is coated with anti-rust oil; slight welding marks on screws are normal and won’t impact performance. Feel free to contact us if you need help.)

6-in-1 Wasp Nest Removal Tool Set:This tool set is a versatile solution that makes it easy to remove and clean wasp, wasp, yellow jacket, and bird nests. wasp nest removal tool includes an aluminum telescoping wand, multi-edged blade, 3-inch scraper, spray can extension wand adapter, cleaning brush and safety goggles.

Reach New Heights with Ease: the wasp nest removal tool features a 118.11 inches/ 3 meters telescopic stainless steel rod, giving you the flexibility to safely access high or hard-to-reach areas; Its adjustable 3 section design ensures that no nest is out of reach, catering perfectly to homeowners needing efficient nest removal