

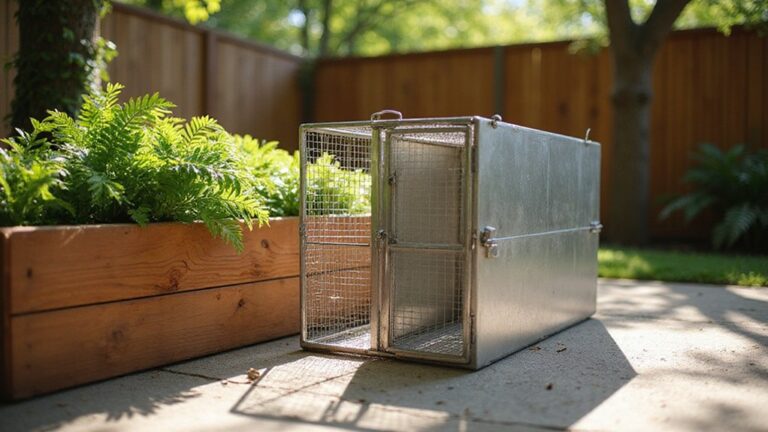
Knowing how to build a humane live trap can help you manage unwanted critters safely and effectively.
With just a few basic materials like plywood, hardware cloth, and a simple trigger, you can create a trap that’s both sturdy and reliable.
By the end of this guide, you’ll have the skills to build and place your own trap that respects local wildlife laws.
What You Need to Build a Sturdy Box Trap
To build a sturdy box trap, gather materials that ensure durability and effectiveness. Start with exterior-grade plywood or scrap lumber to form the main body, as these materials resist weather and wear. For mesh panels, use galvanized hardware cloth or welded wire because these resist rust and provide strength. The door requires a solid board or plywood panel, plus wooden strips to serve as guides for smooth opening and closing.
For the trigger mechanism, simple items like sticks, dowels, or wire work well. Connect the trigger to your bait with a piece of string, enabling a quick release when the animal interacts with the bait. Fasten all components with exterior-grade screws and optionally add wood glue for extra stability. For the most effective capture, consider using peanut butter or chocolate as bait, as these are highly attractive to mice.
Regular maintenance involves choosing corrosion-resistant mesh and treated plywood to withstand outdoor conditions. The bait you select influences your trigger design: common baits like pieces of fruit or nuts work best with simple stick or notch triggers. The mosquito bits duration depends on moisture levels and temperature, so consider replacing bait if it spoils quickly. If targeting carpenter bees, consider adding a top bee trap design to improve capture rates. Including mesh around the trap allows airflow, which helps keep the animal calm during capture and makes the trap easier to monitor. With these material choices, your box trap will be sturdy, effective, and long-lasting.
Pick the Right Dimensions for Raccoons, Opossums, and Woodchucks
The ideal trap size for raccoons, opossums, and woodchucks is between 30 and 36 inches in length, 10 to 12 inches in width, and 10 to 14 inches in height. These dimensions match their common body shape and ensure the animal can enter fully without feeling cramped. A trap measuring 32 by 10 by 12 inches is suitable for all three species. For larger animals like bigger raccoons or woodchucks, opt for a 36 by 12 by 12-inch trap. The material, whether wire mesh or wood, doesn’t impact these measurements. Using dark, neutral colors helps prevent spooking the animals. Always choose a size that allows the animal to move comfortably inside with shoulders and hindquarters fully inside, avoiding any compression. This size trap is constructed from rust-resistant wire mesh for durability and corrosion resistance. When exposed to moisture, covering the trap with a pond net can provide additional weather protection for the structure. For best results, place the trap on level ground to prevent it from rocking when the animal enters. However, wasps may be attracted to the bait in the trap, so wearing a protective bee suit can shield you from stings during setup and inspection.
Build the Box Frame Step by Step
When building the box frame, start by selecting durable, straight lumber or rust-resistant steel for maximum rigidity and longevity. The material choice is crucial for outdoor settings, as moisture can cause corrosion or warping. Before assembly, cut all structural pieces—top, bottom, sides, and corner posts—to ensure the frame remains square during construction. Use a measuring tape and a square to get precise cuts, which helps keep the frame true. For added protection, consider using garden netting to cover any openings if the trap is used in a planted area. Secure the wire mesh to the frame using correct spacing and fixings to prevent sagging or weak points that could allow an animal to escape.
Assemble the rectangle on a flat surface, keeping opposite sides parallel, to maintain proper shape. Fasten joints firmly with screws or nails; this prevents racking or distortion when the frame is under stress. Reinforce corners and top edges where the most stress occurs, especially if the trap will house larger animals. Additional bracing in these areas adds strength and stability. Following safety precautions helps prevent injury when handling tools and materials.
Ensure all cut edges are smooth to avoid injury or splinters later. Leave enough surface space around the frame for attaching wire mesh or plywood later on. A properly rigid and securely fastened frame ensures the trap remains aligned and prevents binding, providing a solid foundation for the trap’s moving parts.

Telescoping Adjustable Design: Our telescoping gate frame stretches from 36” to 72” wide, support 1”x4”lumber. No extra cutting or custom modification needed, ideal for yard, driveway and walkway openings, seamlessly matches your existing fence aesthetic

Perfect for attaching trim, window frames and door casing.

Install the Door Track and Free-Fall Mechanism
To install the door track and free-fall mechanism correctly, begin by mounting the track on solid wood blocking or header material to prevent flexing. Position the track’s centerline at door height plus approximately 1 3/4 inches above the floor to ensure proper clearance for free movement. Before fastening, level the track carefully to guarantee perfect alignment; any tilt can cause the door to bind during the fall.
Pre-drill holes into sturdy studs or blocking—never into drywall alone—to secure the track firmly. Dry-fit the door to verify it moves smoothly along the track without scraping the uprights. For the free-fall mechanism, reduce all friction points to ensure a decisive drop. The door must have enough weight to fall rapidly when released, so add or adjust weights as necessary. Ensure the release system separates cleanly from the door’s path, leaving no obstructions or sticking points. For the door panel itself, cutting hardware cloth requires sharp tin snips or aviation shears to achieve clean edges.
Install track stops at both the open and closed positions to control the door’s range of motion, along with a floor guide to prevent lateral shifts during operation. Test the system repeatedly; the door should slam shut without sticking or bouncing. Make adjustments as needed until the door drops cleanly and quickly each time. For live trapping, baits like peanut butter can be used inside the trap to attract rodents.

✅ Barn Door Roller - Material: Carbon Steel, Surface: Black Powder Coated .

Johnson Hardware 100SD Series 60 in. Track and Hardware Set for 2-Door Bypass Doors
Set up the Trigger System With a Bait Stick and String
To set up the trigger system with a bait stick and string, start by shaping the bait stick with a pointed end and a notched end that locks securely into the trigger assembly. Ensure the notch depth is about half the stick’s thickness to hold firmly but still allow easy release. Position the bait stick horizontally, aligned directly with the trigger’s path, which helps improve trigger accuracy by preventing slipping during activation.
Tie the string from the bait stick to the trap’s toggle or spring pole, making sure it follows a straight, direct pull line. Adjust the string tension carefully: too much slack causes delays in releasing the trap, while too much tension risks setting off the trap prematurely. You want the string tight enough to hold the bait stick in place but loose enough for a smooth release when triggered. This trigger system’s sensitivity can be fine-tuned by sliding the trigger toward or away from the chamfered end. Using cheap materials like a wooden clothespin or coat hanger wire can simplify the build and reduce costs. The trap should be placed in a location where animal activity is evident to increase the chances of a catch. Similar to how mosquito dunks for ponds provide reliable pest control, this trap design ensures consistent performance when placed correctly.
Test the setup multiple times to verify smooth release with minimal disturbance. Fine-tune both the notch depth and string length so that the trigger responds reliably and consistently without sticking or jerking. This method ensures a quick, dependable activation when an animal interacts with the bait.

Heavy Duty Natural Wood Construction:Made from sturdy, splinter free wood for long lasting outdoor or indoor use. Resists warping, cracking, and harsh weather.

CLASSIC: Traditional clothes pins for crafts and hanging laundry pegs

Durable & Classic Wooden Clothes Pins: Made from birch hardwood, these wooden clothespins resist moisture and rust, making them perfect for hanging clothes, towels, and linens both indoors and outdoors. These round clothes pins provide a secure grip for laundry and household use.
Place the Bait to Draw Animals Past the Trigger
Place the bait directly behind the trigger to maximize effectiveness. Positioning the bait at the rear of the trap, just beyond the trigger plate, ensures the animal fully enters the chamber before reaching the food. This setup makes it necessary for the animal to cross the trigger area, increasing the chance of a successful capture. Keep the bait centered and away from the walls to prevent animals from side-stealing it without triggering the mechanism. Use small trails of bait leading from the entrance toward the main bait to guide animals inward—this helps direct their movement without replacing the primary bait. Secure the bait in a way that it hangs above or inside a container behind the trigger or place it directly behind the trigger itself. Fresh and species-specific bait enhances attraction, aligning with the habits of your target animals and increasing the likelihood they will fully enter the trap. For example, using sweet bait like honey buns or mashed bananas helps avoid catching cats while still attracting skunks and possums. When constructing the trap housing, choose durable galvanized wire that resists rust and animal damage for long-lasting use. For groundhogs, consider setting the trap near the burrow entrance to intercept their habitual path. Remember that mosquito bits work differently, targeting insect larvae in standing water rather than attracting larger animals.
Test the Door Drop and Adjust Trigger Sensitivity
To ensure your trap fires reliably, start by testing the door drop and adjusting trigger sensitivity. First, verify the door drops cleanly into place without sticking or bouncing back. Release the door and check that it sits level when engaged. Lightly tap the trap to confirm it doesn’t false-trigger from minor movement. Observe the alignment between the door, latch, and trigger rod to prevent misfires. Using cheap materials like thin wire for the trigger can also affect overall durability and sensitivity.
Next, focus on calibrating and adjusting the trigger sensitivity. Use a pair of pliers to make small bends to the L-shaped trigger: bend the bottom upward to reduce sensitivity for heavier animals, or downward to increase sensitivity for lighter animals. Be cautious not to over-adjust, as too much bend can disrupt the trap’s balance and cause unreliable firing. Additionally, dirt buildup or grinding into the soil can hinder trigger movement, so clean the contact points thoroughly before testing. If you use hardware cloth in the trap design, note that it can rust unless coated, which may eventually interfere with smooth trigger movement. For water-based pest control, consider that mosquito dunks per gallon require precise dosing to avoid waste.
Match the trigger sensitivity to your target animal. For heavier animals, set the trigger to a lower sensitivity to avoid false triggers; for lighter animals, increase sensitivity to ensure they set off the trap. Check that the trigger hook engages securely and that the door rests properly on the trigger point. After each adjustment, reset the trap and perform multiple tests with a light tap to ensure consistent firing. The final setup should strike a balance, making the trap sensitive enough to catch your target while remaining stable enough to prevent false trips.
Where to Set Your Live Trap for Best Results
Position your live trap along known animal travel routes such as animal trails, fence lines, or burrow entrances to maximize your chances of a catch. Align the trap opening parallel to the direction of movement or the wall to encourage animals to enter naturally. For habitat selection, place the trap near confirmed sources of food, water, or shelter that your target species favor. Choose shaded, level ground to prevent tipping and to reduce heat stress, which is critical for trap safety and effectiveness. Avoid open areas exposed to sun, nearby roads, or steep slopes where animals could get injured. Instead, set the trap near cover like dense vegetation or structure edges to make the spot feel secure. Position traps on flat, level surfaces and weigh them down if necessary to prevent the trap from being knocked over by foraging animals. If no activity occurs within 48 hours, reposition the trap to a nearby site with signs of animal activity, such as droppings or gnaw marks, to increase your chances of success.

High Quality Materials:SZHLUX Live Animal Cage Trap use low carbon steel wire and medium frequency welding. In this way, the product surface is flat, the welding is firm, and it is not easy to solder off.Weather and rust resistant.

HUMANE ANIMAL CAPTURE: The Havahart Easy-Set humane catch and release trap is ideal for rabbits, skunks, squirrels, and weasels

Wide Application: As urban and wilderness ecosystems intertwine, animals may disturb your life. Our cat trap is a versatile solution for various animals, including cats, raccoons, rabbits, groundhogs, armadillos, and opossums. It effectively addresses issues such as farmland invasion, release, and harassment.
Follow These Humane Trapping Rules
To ensure humane trapping, follow these essential rules. Carefully place traps in areas where animals are active and select bait that attracts your target species without causing unnecessary stress. Once an animal is captured, keep the trap open for the shortest possible time and check it at least once every 12 hours after sunrise. If you are using remote monitoring, inspect traps within 24 hours. Never leave a trap set if you cannot check it soon after.
Protect animals from harsh weather conditions by shading traps during hot days, closing them in extreme cold or heat, and insulating them in frigid weather. Providing bedding inside traps can help animals stay comfortable in cold temperatures. To minimize injury, use traps with smooth interior surfaces and ensure they are secure and stable.
Handle trapped animals calmly to reduce their stress. Covering traps with cloth can help keep animals calm during handling. If animals must be confined for an extended period, supply them with food and water, and keep their holding containers clean and protected from predators. When releasing animals, do so at the capture point according to local regulations, or relocate them only where it is legally permitted. For humane euthanasia, make sure it is performed by trained handlers to ensure it is done compassionately.
Check Legal Requirements for DIY Traps in Your Area
Check your state and local trapping laws before setting any DIY live trap. You cannot assume one rule fits all because most states require a trapping license. Some states also impose special permits for trapping certain species, such as marten in New York. Local ordinances may prohibit trap placement in parks or near highways, and municipal rules can override state regulations—especially for humane live traps on private property.
To avoid legal issues, verify permit requirements at least 30 days before setting traps, particularly in states like Missouri where permit approval can take time. Species-specific rules differ depending on the county, refuge, or management area; for example, Minnesota requires permits for trapping beaver or otters within certain refuges. Additionally, check for restrictions on trap type because some jurisdictions ban designs that could injure domestic animals.
Prioritize both trap prevention and humane trapping, which means confirming whether written landowner or city permission is needed before you set any traps. Ensuring compliance with all applicable regulations helps you avoid fines or confiscation of your traps.