


Have you ever wondered how to make your own mosquito zapper at home? It’s easier than you might think, using just a few simple parts like a 6V battery, a high-voltage transformer, and a UV bulb.
When assembled correctly, your DIY trap can be surprisingly effective at catching those pesky insects. Keep reading to see how you can build one safely and efficiently.
What You’ll Need: Parts List for a DIY Mosquito Zapper
You’ll need a 6V rechargeable sealed lead-acid battery, a 9V battery with an on/off switch, or a 12V DC adapter for power. The choice depends on your desired portability and build size; the battery offers portability, while the adapter is suitable for stationary setups. For high-voltage conversion, a high-voltage transformer is essential. You can scavenge a flyback transformer from an old CRT monitor or repurpose circuitry from a rechargeable lantern. Core components include 630V-rated PPC capacitors and a 1000–2000pF 3–6kV smoothing capacitor to handle voltage spikes. Use 1N4007 diodes to rectify the high-voltage output, and an oscillator transistor such as TIP122 to generate the necessary oscillation. Consider using top bee traps as an alternative if your primary target is large stinging insects rather than mosquitoes. Unlike mosquitoes, wasps are often too large for a standard zapper grid, and bee suits do not shield you from their stings. For squirrel-related pest issues, a DIY squirrel baffle can be built from cheap materials and simple tips to protect bird feeders.
A 1MΩ discharge resistor is critical for safety, ensuring the high-voltage grid discharges when the device is turned off, preventing static buildup. For attraction, select a UV light bulb with its socket, which draws insects toward the zap zone. Finally, pick a fine stainless steel mesh with 1/4-inch spacing to form the zapping grid. This mesh must be durable and resistant to corrosion since it will be exposed to outdoor conditions and constant zapping activity.

【💤 More Quiet】50% zapping noise reduction in comparison with other traditional capacitor type bug zappers. Silenter, more pets and children friendly.
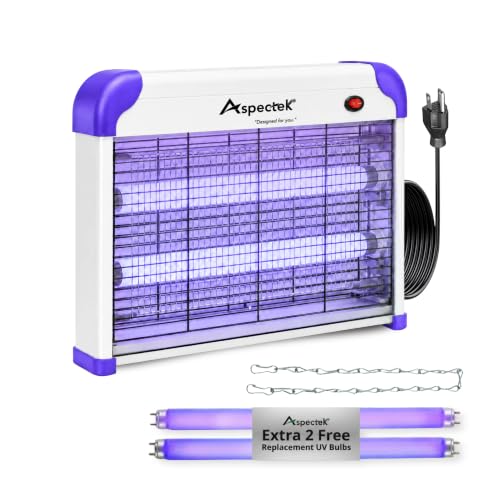
360° DUAL-SIDED INSECT ATTRACTION: Open dual-sided design helps attract mosquitoes, flies, fruit flies, gnats, moths, and other flying insects from multiple directions for wider coverage. Ideal for garages, basements, patios, BBQ areas, and covered outdoor spaces.
Build the Frame for Your DIY Mosquito Zapper and Mount the Light
Start by cutting a round wooden base plate that fits snugly inside your chosen cylindrical outer shell. This base will act as the stable foundation for your zapper body. Drill a six-hole pattern evenly spaced around the perimeter of the base for vertical wooden dowels. These dowels reinforce structural integrity and create insulating gaps between mesh layers, preventing unwanted contact.
Use a spade bit to drill a clean, centered hole for the light socket. Mount the UV bulb at the assembly’s core using hot glue for mechanical retention, ensuring it stays securely in place. Unlike coyote urine, which can attract unwanted pests to your yard, UV light is a reliable attractant for mosquitoes. For outdoor installations, pond netting can protect the zapper from falling debris while still allowing airflow. Make sure your frame’s geometry allows enough clearance so the cylindrical mesh can sit concentrically around the light without touching it or the housing walls.
Secure the mesh panels tightly to the support dowels, verifying that the mesh is aligned properly. Proper alignment prevents sagging towards the bulb or housing, which could cause arcing or inefficient insect attraction. This rigid, well-centered frame guarantees the zapper will function effectively and safely.
Build a Weatherproof Housing That Keeps Fingers Off the Live Grid
To keep fingers off the live grid, choose an enclosure rated at least IP65. Start with a UV-stabilized polycarbonate box: it resists UV embrittlement, impact, and moisture, making it suitable for outdoor conditions. Avoid cheap indoor plastics that crack in sunlight and fail over time. Ensuring proper sealing is key—use a gasket that sits evenly around the lid to prevent water ingress. For cable entries, employ compression glands that tightly seal around wires, blocking water from tracking along the cables. Mount the grid deep within a fully enclosed, rigid barrier so there are no openings for hand access. Use screws that require tools for removal, deterring casual tampering. Minimize holes, seams, and cutouts in the enclosure, as each penetration can become a leak path. Finally, position the housing to avoid water pooling around it, since IP65 enclosures withstand rain but are not designed for submersion. For additional safety, consider placing non-conductive cage traps in the enclosure to physically separate curious fingers from the grid.

【Specifications】Product name: Electrical Box; Waterproof rating : IP65; Qualification:CE、ROHS; Material: ABS, PC; Net Weight: 190g; Main Color: Gray,Transparent.

[ Sturdy Material ] - Made of high quality ABS plastic and has adequate thickness to offer a durable construction. This junction box has superior impact resistant and electrical insulation.

【Specifications】Product name: Electrical Box; Waterproof rating : IP65; Qualification:CE、ROHS; Material: ABS, PC; Net Weight: 540g; Main Color: Gray,Transparent.
Wire the High-Voltage Grid for a Safe Mosquito Zapper
Wiring the high-voltage grid safely involves several critical steps. First, ensure there is a 6 mm gap between your fine-mesh electrodes. This distance allows small insects to bridge the gap and be electrocuted while minimizing the risk of accidental contact. Mount the grid on insulating supports, positioning it away from motors and low-voltage wiring to prevent arcing. Use a transformer to step the input power up to a high voltage between 2,000 and 4,000 volts for effective insect killing, but keep the output current low by generating short discharge pulses. Be aware that capacitors will store charge even after unplugging, so handle them with caution. Confirm all joints are dry and well-insulated, and route the power cables away from the grid. Ensure that the final assembly makes live conductors inaccessible from outside the housing to prevent accidental shock.

【Safe Insect Zapper】This mosquito zapper is made of durable ABS plastic with a 0.27-inch safety gap to prevent accidental contact, making it safe for kids and pets. It physically kills pests, ensuring safety for humans and pets

【🌈 Hybrid Spectrum】15W hybrid regular UV and black UV dual bulbs emit a broader light spectrum, which is more effective in attracting a variety of pests, including flies, fruit flies, mosquitoes, gnats, and moths, etc.

【High-Efficiency 4200V Zap - Advanced Insect Control】: Equipped with a powerful 4200V electric grid and a professional 365nm light that attracts mosquitoes and flies effectively. This high-performance zapper helps maintain a comfortable environment for your home, patio, or backyard.
Test Your DIY Mosquito Zapper Without the Jolt
Before plugging in your mosquito zapper, ensure safety by taking these steps. Unplug the device and wait at least ten minutes for the capacitors to discharge, preventing a potential jolt. Use an insulated tool to carefully discharge any remaining stored charge. Visually inspect the entire grid area for burn marks, cracked insulation, or debris that could cause shorts or malfunctions.
For a safe test without risking a shock, employ a non-contact high-voltage detector to confirm the grid is energized. In a dark room, observe for a faint corona glow or listen for a soft crackling sound that indicates it is working correctly. Make sure the UV lamp is illuminated to attract mosquitoes. For more detailed checks, disconnect the input power and use a multimeter to measure transformer resistance or capacitor capacitance. Never touch the grid directly during testing. If you notice continuous loud buzzing or excessive sparking, disconnect immediately to avoid damage or injury. After testing or adjustments, always unplug and discharge the device again before handling or modifying it.
Place the Zapper in Sheltered Shrubbery for Higher Catch Rates
Placing your mosquito zapper in sheltered shrubbery can significantly increase its catch rate. Dense shrubs and tall grass are prime mosquito habitats, so positioning the zapper nearby targets where mosquitoes already hide. Shade placement is crucial; shaded microclimates near vegetation keep mosquitoes active because direct sun reduces their activity levels. Sheltered shrubbery also blocks wind, which can disrupt mosquito flight and prevent them from reaching the trap. Using heavy-duty galvanized wire will ensure the zapper’s enclosure withstands outdoor moisture and rust over time. This approach mirrors the logic of carpenter bee traps, which also rely on placing the trap in sheltered areas where the target pests naturally seek refuge. For horse flies, selecting a trap with a durable, weather-resistant design is equally critical to long-term outdoor performance.
Position the unit on the shrub edge rather than deep inside. This allows mosquitoes easy access while still benefiting from the shelter and shade. Keep the zapper 20 to 40 feet away from patios, especially between breeding sites and areas where people gather. This placement intercepts mosquitoes early, before they bite. Avoid open lawns and sunny spots, as mosquitoes are less active there and you’re likely to catch fewer insects. Instead, focus on calm, shaded cover for the best results.

【Outdoor Bug Control for Late-Summer Evenings】 Flying insects can interrupt patio dinners and backyard gatherings while evenings are still warm. This solar bug zapper outdoor uses purple UV light to help attract light-responsive flying insects toward its internal electric grid for contact zapping. Place each garden bug zapper near garden edges or patio perimeters, away from your main seating area, for late-summer and early-fall use.

【UV Light Attracts Flying Insects】Purple UV light helps draw mosquitoes, gnats, moths, flies, and other small flying insects toward the internal electric grid for contact zapping. Ideal for patios, gardens, lawns, flower beds, and walkways where flying insect activity is common after dark.

【MORE THAN A BASIC BUG ZAPPER — 3-STAGE ATTRACTION & CONTROL】Flying insects don’t always head straight for an electric grid. That’s why Sayneep combines a targeted attraction light, continuous airflow, and an electric grid in one integrated 3-stage system. The light draws mosquitoes, flies, gnats, and moths toward the unit, airflow helps pull them closer, and the grid delivers the final zap—giving you a more complete approach to everyday flying-insect control
Upgrades That Actually Improve Capture Rates
Optimizing airflow design can significantly boost your mosquito trap’s effectiveness. Aim for a directed suction speed of about 2 meters per second; this ensures a strong pull that draws in mosquitoes without creating turbulence that can scare them away. Adjust the intake geometry—such as narrowing the opening or shaping the duct—to focus airflow directly into the trap. Adding a CO₂ source and BG-Sweetscent lure can increase capture rates up to 8.5 times. For suction traps, incorporating a heating element enhances approach behavior by mimicking human warmth, making the trap more attractive. Inside, install fine mesh or textured liners to prevent mosquitoes from escaping once they’ve been caught. When building the trap, using cheap materials like a plastic bottle and dish soap, as detailed in DIY gnat trap guides, provides an affordable alternative for the capture container. Always position the trap’s trigger mechanism and bait placement away from the fan’s direct blast to avoid creating a dead zone where mosquitoes hesitate to enter. These modifications can transform a basic device into an efficient mosquito killer, maximizing your chances of success.