


Struggling to keep mice out of your home? A simple, homemade live trap can help catch and release them without harm.
You can have one ready in just minutes using common materials like a bucket, a wire hanger, and a can.
By the end, you’ll know how to make an effective trap, place it properly, and safely release your furry visitor far from your house.
Keep reading for all the step-by-step details.
What Materials Do You Need for a DIY Mouse Trap?
To build an effective DIY mouse trap, you’ll need various materials that are often found around your home. A smooth-sided bucket or a sturdy cardboard box serves as the main container to hold the mouse. For creating triggers and pivots, use a wire coat hanger or stiff wire. To allow mice easy access, a wooden plank or ramp is helpful. For the trapping mechanism, a dowel, pencil, or paper plate can act as a weight-sensitive element. For those interested in commercial alternatives, reviewing top bee traps can help you compare different designs for other pests. For vole control, a finer mesh hardware cloth is recommended to prevent gnawing through the material, similar to how sturdy hardware cloth provides durable protection against rodents. Understanding the standard wire gauge of chicken wire is important when selecting materials for lighter pest barriers.
Tools like scissors, a box cutter, and pliers are essential for cutting and shaping materials. Bait such as peanut butter, cheese, or seeds should be placed in a small dish to attract the mouse. Reinforcing your trap with duct tape and rubber bands will improve durability and prevent escapes. Focus on choosing strong, durable materials like thick walls and secure fastenings to make sure the trap holds up during use.
For aesthetics, using uniform materials and clean cuts can make your trap look neater, but functionality and reliability are the top priorities. To keep cleanup safe, have gloves and disinfectant on hand. Gathering all these materials beforehand ensures your DIY trap is both effective and easy to assemble.

High quality raw materials: Our hardware cloth chooses the strength, toughness and ductility of low carbon steel wire as the inner core. This determines the basis of the high quality of our products.23Gauge Galvanized After Welding Wire Metal Mesh Roll Use this to protect vegetables and flower roots, bulbs, rhizomes, etc from tunneling animals. pack:A roll of hardware cloth

❶ UPGRADED HOLE FILLER——This rust-resistant 304 stainless steel mesh helps fill suitable openings around weep holes, plumbing, A/C units, vents, and other entry points in homes or office buildings.

LEGENDARY MICRO-WOVEN CLOTH – With over 10 million sold, the SteelSeries QcK is the pinnacle of surface performance and innovation.
Build a 5-Minute Bucket Trap That Never Misses
To build a reliable 5-minute bucket trap that never misses, follow these steps. First, drill two holes directly opposite each other just below the bucket’s rim, along with two matching holes through the center of a lightweight can or paper plate. Thread a wire hanger through these holes, making sure the bait surface is centered. Secure the wire ends tightly so the axle won’t slip under the mouse’s weight. To improve accessibility, lean a small board against the rim for quick entry. For better stability, snip dowel ends to about 3/4 inch to ensure free rotation of the can. Unlike Thermacell refills, this trap uses cheap materials like a bucket and coat hanger. For a more effective deterrent against larger pests, consider adding a few drops of peppermint oil around the bucket’s exterior to repel rabbits similarly.
Next, spread peanut butter on top of the can or plate. The trap’s effectiveness hinges on its trigger mechanism: when the mouse steps onto the bait surface, its weight flips the can, causing it to drop inside instantly. Place the trap along baseboards where mice typically travel—look for signs like droppings or runways. Proper placement ensures you catch mice efficiently. For a humane catch, you should check the trap regularly to minimize stress on the animal.
Always cap the wire ends with tape to prevent sharp edges and check the trap regularly to ensure humane treatment and consistent operation. This straightforward setup allows you to catch mice every time without missing.
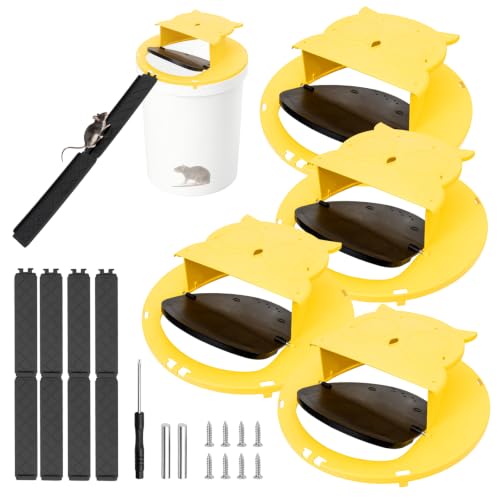
【Upgraded Bucket-Lid Mouse Trap】Equipped with a reinforced metal roller and sturdy screw assembly, this mouse trap bucket flip lid outperforms ordinary plastic alternatives. It’s a dependable solution that delivers long-lasting home protection for indoor homes and outdoor spaces.

Mouse Trap Bucket: Automatically resets and holds upwards of 10 mice and 5+ medium-sized Rats. Unlike conventional mouse trap bucket lid which only catches 1 or 2. The test concluded that the multi-catch traps by almost 4x. 5 Gallon Bucket is NOT included.

Bucket Lid Mouse Trap: Automatically resets and holds upwards of 10 mice and 5+ medium-sized Rats. Unlike conventional mouse trap bucket lid which only catches 1 or 2. The test concluded that the multi-catch traps by almost 4x. 5 Gallon Bucket is NOT included
Catch Mice With a Cardboard Tube Trap
Regularly check your cardboard tube trap, ideally every few hours, to ensure captured mice are not left suffering. Since the trap operates using gravity rather than springs, it’s quick and easy to reset once emptied. For the most effective outcomes, place the tube on a flat surface and use heavy bait like peanut butter to encourage entry. For optimal results, choose a bait with a strong scent, as peanut butter is often recommended as a top attractant. Place the trap in areas where you’ve found droppings or signs of mice activity, but keep in mind that its effectiveness depends on the setup’s balance and whether the mouse is willing to enter. Always dispose of caught mice promptly and reset the tube to catch another. For a more durable option, consider commercial live traps that are built specifically for reliable repeated use.

WORRY-FREE CATCH & RELEASE - Mouse friendly live mouse traps, designed to catch mice in a stress and cruelty free way. With extra air holes and plenty of space, these ethical mouse traps provide a comfortable space & a compassionate solution.

WORRY-FREE CATCH & RELEASE - Mouse friendly live mouse traps, designed to catch mice in a stress and cruelty free way. With extra air holes and plenty of space, these ethical mouse traps provide a comfortable space & a compassionate solution.

WORRY-FREE CATCH & RELEASE - Mouse friendly live mouse traps, designed to catch mice in a stress and cruelty free way. With extra air holes and plenty of space, these ethical mouse traps provide a comfortable space & a compassionate solution.
Where to Set Your DIY Mouse Trap for Best Results?
For the best results, set your traps perpendicular to walls with the trigger end against the baseboard, making sure there are no gaps. Placing traps back-to-back is effective when rodent traffic flows in both directions. Spread multiple traps 2 to 3 feet apart along active routes instead of scattering them randomly or widely. Avoid placing traps away from walls, where you notice no recent signs of activity, or in open middle areas of rooms, as these positions are less likely to catch mice or rats. Similar to how squirrel-proof feeder designs use angled perches to block unwanted access, positioning traps flush against walls forces rodents to approach from the trigger end. Proper placement increases your chances of intercepting rodents where they travel most frequently. When setting traps, also consider the importance of bait selection and securing bait firmly to the trigger to prevent non-target animals from stealing it. This approach relies on the same principle as bird spike barriers that guide pests into a confined path for effective capture.

NO SEE, NO TOUCH, NO STRESS: Indoor mouse traps for home use without the yuck; the covered trap box means you never see or touch the catch, and the whole disposable trap goes in the bin for a no mess finish
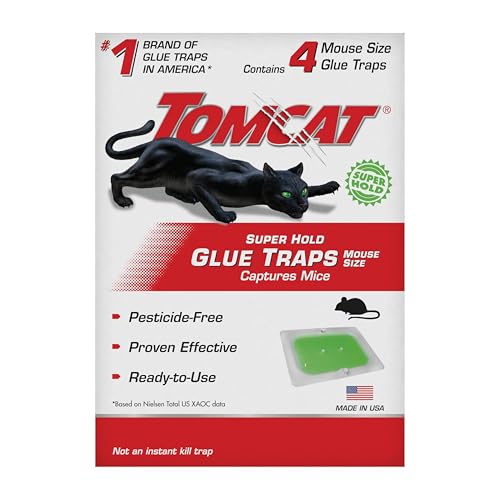
EFFECTIVELY MOUSE GLUE TRAPS: Tomcat Super Hold Glue Traps Mouse Size effectively capture mice and other household pests like cockroaches, spiders, or scorpions, providing a pesticide-free indoor trapping solution
How to Release the Mouse Safely
To release a captured mouse safely and humanely, start by wearing gloves to protect yourself from bites or contact with potential germs. Keep the trap level throughout transport to prevent the mouse from escaping or injuring itself. Cover the trap with a towel to calm the mouse and reduce stress, acting as a camouflage that makes the environment less frightening for it.
Transport the trap at least one mile away from your home or building to a suitable natural habitat such as a brushy field or hedgerow that offers food, water, and cover. Avoid taking it near roads, farms, or other inhabited areas to prevent the mouse from returning or causing issues elsewhere.
At the release site, place the trap on the ground and open the door facing away from you to allow an easy exit. Step back and avoid reaching inside to prevent frightening or injuring the mouse. If it hesitates to leave, wait 10 to 15 minutes to give it time to sense the environment is safe. Choose a quiet, mild-weather time for release to reduce stress on the mouse.
Once the mouse has left, clean the trap thoroughly with soap and hot water, then disinfect it with an appropriate rodent-safe cleaner. Wash your hands completely afterward. Allow the trap to dry fully before reusing it to prevent mold or bacteria buildup.
Why Live Traps Beat Poisons and Snap Traps
Choosing a live trap over poisons or snap traps offers numerous benefits. First, it eliminates the risk of rodenticides contaminating your home or environment. Pesticide safety concerns are avoided because there is no exposure to toxic chemicals—reducing secondary poisoning risks to predators like birds of prey and other wildlife. Environmental impact is minimized since non-target species won’t be exposed to harmful bait. For instance, a sturdy chicken wire fence can also be used to secure the release area, ensuring the trapped mouse cannot immediately re-enter your garden. For a reliable and effective solution, consider purchasing the best live animal traps for rats that have been rigorously tested for performance.
Live traps also prevent unpleasant situations like finding a mouse dead inside your walls, which can cause foul odors that are difficult to reach and clean. Instead, you handle a living rodent that remains contained, allowing for better control and immediate awareness of a catch. This method enhances animal welfare since you capture pests humanely and can release them far from your property. Furthermore, live trapping reduces the chance that predators will ingest poison through contaminated prey, helping protect local ecosystems. For those dealing with a severe infestation, a bug bomb for roaches offers an alternative approach for different pests but should never be used around live traps. Unlike snap traps, which kill instantly but often leave behind a carcass, live traps provide a humane, chemical-free solution with the added benefit of full monitoring and control.