

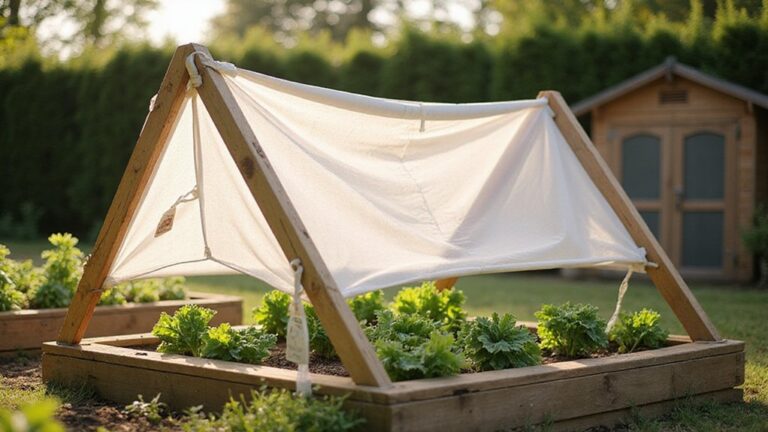
Struggling with pests and predators attacking your garden? Building a simple, cost-effective netting frame can protect your plants without breaking the bank.
In just under an hour and for less than $20, you can create a sturdy frame using basic materials like PVC pipes or bamboo stakes.
Keep reading for an easy step-by-step guide to keep your garden safe and thriving.
Build a Cheap Garden Netting Frame in One Hour
Start by marking your garden bed footprint on the ground. Measure the width and crop height to ensure the frame fits your plants without wasted material. Reduce the width slightly to compensate for pipe curvature at the sides. Add extra height for soil insertion to keep uprights stable. Use a simple rectangle or arch shape for easy placement. This method allows flexibility in design, making it simple to adjust the shape to fit any bed size. For connections, use Figo three-arm bamboo connectors to quickly link the cane pieces. If standing water collects in the bed, ensure you have a separate mosquito dunk to prevent larvae breeding under the netting. For additional pest protection, consider placing a specialized bee trap nearby to catch wood-boring insects. To further deter climbing pests, a squirrel baffle can be mounted on frame legs to block access from the ground.
Choose a quick and modular frame shape, such as a rectangular base with uprights and a top rail. Using tee and elbow connectors speeds up assembly and removes the need for complex joinery. Adding cross-supports prevents sagging and maintains the frame’s shape over time. Select sturdy materials like thick cane or pipe that can withstand tension without snapping. Keep the footprint closely matched to your planting area to avoid weak spots and unnecessary spans.
What You’ll Need: Materials Under $20
You can build a functional garden netting frame for under $20 by focusing on three key materials: lightweight PVC pipe, budget netting, and basic connectors. Use 1/2-inch PVC pipe, which costs under $7 per section, for the frame structure. For netting, opt for bird netting at around $6 or tulle polyester net at approximately $2 per meter, saving money but sacrificing some durability compared to premium insect netting. Connectors such as slip elbows and tees are inexpensive and create simple, effective corners. Fasten the netting with adjustable plant ties or string, and secure the edges using bricks or wooden pegs. Although this setup might not win beauty contests, it’s practical and budget-friendly. Avoid fiberglass hoops, as they tend to cost more and exceed the $20 limit. Reinforce the frame with bamboo stakes, which are free if you already have them or can be bought cheaply. For additional protection against spider infestations, consider using a bug bomb under the frame before netting. For the best results in quality and value, read reviews comparing top picks before selecting your netting material. Follow these basics, and staying under $20 is easily achievable. If a skunk accidentally enters your garden trap, use a slow, calm approach and a long stick to gently tip the trap open from a distance, allowing it to leave without being startled or sprayed.

[Powerful Fixing Garden Clips] - For better fixing of garden nets and garden hoops, we use 3 times more elastic stiffened and thickened stainless steel springs. Only a few garden clips are needed to do the fixing job well and keep your plants better protected even in wind and snow (30pcs).

Package Includes: you will receive 32 pieces PVC clamps; Enough quantity to meet your daily use and greenhouse replacement needs

Package Includes: this package includes 16 pieces white PVC pipe clips offering plenty of supplies to meet their daily needs in a variety of applications; Whether it's standard use, replacements, or planned expansions, these greenhouse clips are ready for many projects
How to Measure Your Garden Netting Frame for a Perfect Fit
To ensure your garden netting frame fits perfectly, start by measuring the exact footprint of your garden bed—specifically, the length and width. For rectangular frames, record each side separately to get accurate dimensions. When determining frame size, add extra space for shaping and height, especially for hoop frames which are curved rather than flat. Include an additional 5–10% of material to account for overlaps and fastening points. If you plan to bury part of the netting to stop pests from digging underneath, leave about 0.15 meters (0.5 feet) for burial depth. Always keep your measurements consistent in one unit system to prevent errors. For flat covers, include enough allowance so the net sits loosely without stretching tight. For row covers, measure the width plus twice the height to ensure full coverage. Many top-rated options reviewed for the best bird netting recommend using UV-stabilized polypropylene for long-lasting durability. Following these steps guarantees your netting will fit accurately, with no waste.
Step-by-Step: Build a PVC Arch or Bamboo Box Frame
To build a PVC arch, measure your bed length, then cut the pipes to match. Smooth any rough edges with sandpaper or a file to prevent injury and ensure easy assembly. Use elbow and T-connectors to form the curved arch by joining the cut pipes, making sure all connections are tight to maintain stability. Drive rebar into the ground at determined intervals—about every 3 to 4 feet—to serve as anchors for the arch. Slide the PVC hoop over the rebar, securing it firmly in place. For longer spans, connect multiple sections with additional connectors, ensuring each connection remains tightly secured. Proper ground anchoring and tight connections are essential to prevent the arch from shifting or tipping in windy conditions. Avoid unsupported spans that could cause the structure to flex or collapse under stress. For added security against squirrels, consider installing a tight-fitting mesh guard around the base of the arch. As an alternative, use discarded plastic bottles to create connection points and supports for a bamboo box frame, which provides a rigid structure quickly and at low cost. For added durability, you can wrap chicken wire tightly around the frame to keep pests out while allowing sunlight and rain to reach your plants. For an effective way to lure insects away from the garden, you can add easy DIY wasp trap bait made from sugar water and vinegar near the frame.

Tomatoes fixing buckle:wild range of application, for eggplant, cucumber, stump, vine, tomato, and etc,gardening supplies

Elegant Arch: Elegant white is suitable for weddings, classy parties and just about any occasion. Whether standing alone or covered with climbing vines and flowers, these outdoor arch add a striking focal point to your event. Adding grace and prominence to any outdoor venue with the Arbor features squared lattice side panels

Elegant Arch: Elegant white is suitable for weddings, classy parties and just about any occasion. Whether standing alone or covered with climbing vines and flowers, these outdoor arch add a striking focal point to your event. Adding grace and prominence to any outdoor venue with the Arbor features squared lattice side panels
How to Secure Netting to Your Frame So Pests Stay Out
To secure netting to your frame effectively and keep pests out, start by attaching the edges with clips, zip ties, or staples, spacing them every 6 to 10 inches. This close spacing prevents sagging and blocks pests from slipping through gaps. Pull the netting taut across the frame, ensuring it’s tight but not overstretched, which could cause tears, especially in lightweight mesh.
Bring the netting all the way down to the ground, then pin or weigh down the bottom edge with boards or bricks. It’s crucial to eliminate even a two-inch gap, as pests can slip through tiny openings. Overlap seams and corners where pieces meet, and reinforce these areas with additional fasteners for added durability. Cover any sharp frame edges with tape to prevent tearing of the mesh.
Check the tension after a few days, because netting can loosen as it settles. Maintaining proper tension ensures your pest barrier stays intact over time, providing continuous protection.
45lb Load Capacity: Medium Tensile Strength, Ideal for Organizing Garden Plants, Securing Bundles, and Holding Fixtures

【Large Size】Each mesh is 4 inch (width) x787 inch (length) / 0.1 m x 20 m, 0.6 x 0.98 inch mesh. In addition, we also provide 100 pieces cable zip ties for fastening. Wire fencing is long and wide enough to enable you to cut off any shape that you need

Size: Deer netting size 7 feet x 100 feet; garden netting mesh size 3/4"; color: black; Easy to use accessories included: 10pcs installation nails & 50pcs cable ties
How to Stop Your Frame From Blowing Over
Drive each stake at a 45-degree angle away from the frame to improve wind resistance. This angled placement helps transfer force into the ground more effectively than driving stakes straight down. After anchoring all corners and placing stakes every 3 to 4 feet along the perimeter, give each stake a firm tug to ensure it holds securely. For exposed sites, increase ballast by laying sandbags or bricks along low edges or burying the bottom edge in a shallow trench. Adding cross-supports between sides can prevent twisting in gusts. Always double-anchor the windward side in open areas to maximize stability. Use heavy-duty pegs in soft soil, masonry bolts on paved surfaces, and removable ground anchors for temporary setups. The stronger your anchoring method, the less you’ll need to worry about your frame blowing over. For long-term stability, consider that yellow jacket traps use similar angled anchoring to resist wind and animal disturbance. This technique is effective because angled stakes transfer force into the ground more efficiently than straight pegs. Interestingly, bee suits provide a similar principle of angled defense against wasps by creating a physical barrier that disrupts their attack angle.

Size: 17.5 inches tall x 7 inches wide.

Durable Stainless Steel Construction: Made from high-quality stainless steel material, these metal stakes measure 13 inches in length and come in a pack of 12. With a sleek and smooth finish, they provide sturdy support for displaying your signs.

Package: You will receive 12 pcs, 13 inch metal yard sign stakes. The size is perfect, the quantity is sufficient, and it can meet your daily usage needs. It is an ideal choice for displaying courtyard identification signs
Store It, Reuse It, and Adapt It for Any Crop
You will reuse the same frame year after year by disassembling it into individual parts for compact storage. When you switch crops, simply reattach the netting using hooks or clips instead of rebuilding the entire structure. You can adjust the frame to match each crop’s height: lay covers directly on low-growing plants, or use hoops to keep covers off taller crops like tomatoes. This flexibility makes crop rotation straightforward because the frame adapts to different plant habits. It also maintains effective pest prevention because the cover fits properly every time, preventing pests from slipping underneath. For those seeking an alternative approach, a simple DIY trap using cheap materials can also help control local pest populations. However, like many pest control products, wasp spray does expire and loses its repellent effectiveness, so always check the date on any chemical you use. Unlike ultrasonic devices, which have been shown in tested results to be ineffective for pest control, this netting frame provides a reliable physical barrier.

Comprehensive Accessory Set: Our garden hoops for row cover come complete with 50 connectors, 27 garden clips, 20 meters of floral wire, and a pair of gloves, facilitating easy assembly and secure installation. These accessories ensure a hassle-free setup process, enabling you to assemble the garden tunnel hoops within just 5 minutes. Whether you're a novice gardener or a seasoned enthusiast, our intuitive assembly system makes gardening more accessible and enjoyable.

Eco-Friendly Material: Our garden Hoops are made from high-quality fiberglass that will never rust and are anti-oxidation, good flexibility and can be used for a long time without affecting the soil, and plants.

All-in-one Garden Netting Kit: The garden mesh netting kit includes 10x33ft garden net, 6 sets garden hoops and 12pcs clips. You can cut the plant mesh netting to the desired size and use it with garden hoops, creating a garden netting pest barrier in your orchard, vegetable field, garden and raised bed, effectively protect your carefully planted fruits, vegetables and flowers