


Struggling to get mice to trigger your trap? Many traps fail because bait is placed incorrectly or mice manage to steal it without springing the trap.
Knowing exactly where and how to bait can make all the difference. Keep reading for simple tips to ensure your bait draws mice out and gets the job done right.
Where Exactly Should You Put Bait on a Snap Trap?
Place the bait directly on the trap’s trigger, such as the metal pedal, plastic bait cup, or treadle. Use just a pea-sized dab of bait like peanut butter, which is sticky and stays in place. This encourages the mouse to work the trigger to get the bait, increasing the chance it will spring the trap. Keep the bait small and exposed to prevent it from drying out. Make sure the bait covers only the trigger surface partially, so the mouse has to disturb it to access the food. Position the trap flush against a wall with the baited end facing the wall, along travel routes where mice are active. Ideal spots include tight spaces behind stoves or refrigerators, near droppings, or gnaw marks. Keep the bait fresh and firmly secured to ensure effective trapping. For best results, consider using a trap that mimics the trapping mechanism found in the top bee traps for carpenter bees, which are designed to lure pests directly toward the trigger. Unlike bee suits, which provide only passive protection against stings, a trigger-based trap actively forces the pest to engage the mechanism for the bait.

ATTRACTS MICE AND RATS: Tomcat rodent attractant gel attracts both mice and rats and can enhance the effectiveness of any mechanical rodent trap

EFFECTIVE PEST CONTROL: Delivers reliable rodent management for home or commercial use. Designed to attract and eliminate unwanted pests quickly and efficiently for peace of mind.

HIGHLY EFFECTIVE FORMULA: Specially formulated to attract and eliminate mice, this mouse trap bait is designed to outperform ordinary peanut butter for consistent results.
Does the Bait Go in the Same Spot on Every Trap Type?
Bait placement varies depending on the trap type. For snap traps, you should place bait directly on the trigger mechanism or bait cup to ensure the mouse activates the trap when attempting to take the bait. Live-catch traps require the bait to be positioned deeper inside, behind the trigger plate, so the mouse must fully enter the trap to access it. Glue traps typically use a central lure spot on the adhesive surface rather than a fixed bait point, attracting mice to the center. Electronic traps often have a designated rear chamber or slot for bait, drawing mice into the trap’s interior. For outdoor traps near trees, a squirrel baffle can similarly block access to protect bait from larger rodents.
In all cases, use small portions of bait to prevent theft and avoid over-placing, which can reduce effectiveness. The key is to adjust your bait placement based on the trap’s capture mechanism to maximize chances of success. Never assume one spot fits all; tailoring your bait position to each trap type is essential for effective pest control.
How to Position the Trap for a Trigger Hit
To position the trap effectively for a trigger hit, keep it flat and stable so it doesn’t rock or shift when mice approach. Avoid leaving extra space beside the trap; setting traps side by side allows mice to bypass the strike area altogether. Instead, arrange the trap perpendicular to the wall, turning wall-following behavior into a direct hit opportunity. This placement maximizes your chances by blocking the most likely crossing point, ensuring the mouse encounters the trigger head-on as it moves along the edge. Ensure the trigger faces the wall for maximum effectiveness when placing the trap. For mice attracted by alternative scents, you can also place a small amount of a homemade gnat bait near the trap to increase curiosity without interfering with the mechanism. Always wear protective gloves when handling any trap to avoid bites or stings during setup or removal. Following these tips from a Havahart trap setup guide can also help you avoid accidentally triggering the trap with debris or wind.

PROFESSIONAL STRENGTH GLUE: Our sticky mouse traps utilize a professional-strength glue formulation that has immediate grip and stretchable hold

EASY CLEANUP DESIGN: Covered mouse glue trap offers effective pest control with no mess. Simply dispose after use for a quick and hygienic solution to unwanted rodents in your home or office.

[Upgraded Anti Tear and Anti Slip Design]: In order to solve the problem of mice escaping and unable to catch mice due to sliding of mouse sticky pads, we have added a thick layer of upgraded non woven fabric on the back of the mouse sticky pad; This kind of material will not slide easily when placed, effectively preventing the mouse sticky clip from slipping when struggling; And while ensuring the stickiness of the glue, it is also easy to tear and will not break even if applied for a long time
Where to Place Traps for the Highest Mouse Traffic
Place traps where mice most frequently travel, focusing on walls and baseboards since mice prefer to stick to edges rather than open floors. Look for signs like droppings, gnaw marks, or grease rubs to identify active routes. Target dark, hidden spots such as behind appliances, stoves, and refrigerators, especially in kitchens, basements, and garages—all common hotspots. Cluster traps two to three feet apart along these pathways for better coverage. In areas with heavy traffic, place pairs of traps just an inch apart to increase your chances. You can experiment with different bait types to find what attracts mice best, but always position traps parallel to walls with the trigger facing the runway. Corners are especially effective intercept points because mice tend to slow down there, so don’t overlook those spots. For larger pests, consider chipmunk trap comparisons to handle similar rodent activity in outdoor areas. A similar approach to outdoor mosquito traps can also help reduce pest populations in your yard. To further secure outdoor spaces, choose chicken wire with tight mesh to block rodents from entering vulnerable areas.

KILLS MICE EFFECTIVELY: Tomcat Mouse Killer, Child & Dog Resistant, Disposable Stations use mouse bait blocks to tackle your mouse problem; each block kills up to 12 mice (based on no-choice laboratory testing)

SECURE COMPACT DESIGN - High-quality, lockable, tamper-resistant, only 8.5" x 7" footprint

PREFILLED RAT AND MOUSE BAIT STATION: The Tomcat Rat & Mouse Killer, Child & Dog Resistant, Disposable Station is a bait station pre-filled with one bait block that kills up to 10 rats (based on no-choice laboratory testing)
Best Bait Amount and Texture for a Clean Catch
Use a pea-sized dab of bait—roughly the size of a pencil eraser—and press it firmly onto the trigger. This small amount prevents mice from stealing food without triggering the trap, reducing missed catches. Overloading the trap with bait can encourage mice to nibble around it instead of directly activating the trigger, leading to perimeter feeding and escape. Keeping the bait minimal also helps maintain trap cleanliness by preventing spills that attract ants or mold. Several tested bait options work best when combined with this minimal placement strategy. For optimal results, position the bait so it contacts the trigger’s center, where the mechanism is most sensitive to the slightest tug.
Creamy peanut butter is the preferred bait because its sticky texture holds the mouse’s attention longer at the trigger point. Press the peanut butter flat onto the trigger surface rather than leaving a loose blob, ensuring the mouse must work directly on the trigger to dislodge and activate it. Avoid piling the bait into mounds; instead, spread a thin, even layer. Regularly refresh dried-out peanut butter to keep up its scent and stickiness, which encourages mice to engage with the trap immediately. Proper trap hygiene also means wiping the surrounding area with a mild cleaner to remove human scent, which can deter cautious rodents. Proper bait placement combined with good trap hygiene significantly increases the chances of a successful, clean catch. For comparison, wasp spray effectively kills ants and roaches but should never be used near food-preparation areas or mouse traps because of its toxic chemical residue.

Match Mice’s Food Preferences: Select a gel scent based on what mice already eat in your home—cheese, peanut butter, cocoa, or meat. It draws mice toward snap traps, glue traps, live traps, electronic traps, or bait stations (traps not included)

Alluring Peanut Butter Scent & Easy to Use: Simple to set up, and pre-baited with an irresistible peanut butter scent, our glue trap does not require any additional bait. The mouse traps require minimal maintenance. Just place them along the walls in your garage or basement or under the refrigerator and capture your home invaders. Simply throw it away when done.

WHERE TO USE: Use these mouse and rat bait blocks indoors or outdoors; if applied where children, pets, and non-target animals may have access, bait blocks must be placed inside tamper-resistant bait stations
How to Match Bait to Local Mouse Food Sources
To effectively match bait to local mouse food sources, start by observing what the mice are already eating in the area. In homes with pantry items, use grain-based bait like oats or cereal because mice here prefer carbohydrates. Near bird feeders or barns, opt for seed baits such as millet or canary seed, as those are their preferred snack. If pet food is accessible, choose protein-rich options like kibble or meat-and-grain mixes to attract mice seeking high-protein sources. When trash or sweet foods are available, use treats like chocolate or peanut butter to appeal to their attraction to fats and sugars. This targeted approach leverages the mice’s known food preferences, increasing the likelihood of a successful catch. Adjust your bait choices based on visual evidence of what they’re eating to avoid guessing and to maximize effectiveness. For outdoors, consider that wasp and hornet spray may be needed for a separate pest problem in your yard. Always follow safety precautions when handling traps, such as wearing gloves and placing traps away from children and pets. When storing unused bait, keep it dry and cool to preserve its effective lifespan, similar to how mosquito dunks require proper storage to maintain their potency.
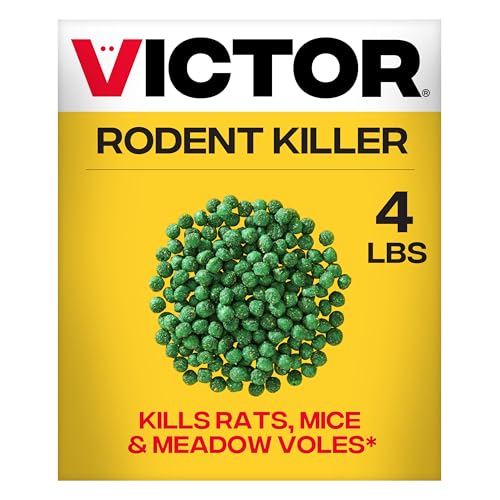
POWERFUL RODENTICIDE FORMULA: Delivers effective rat poison and mouse poison with fish-flavored rodent bait that attracts rats, mice, and voles for reliable pest control

YOUR RODENT FIX: Our rat blocks eliminate infestations with a warfarin bait designed to target common rodents directly in their nesting and feeding areas, making them ideal for protecting homes from damage and contamination

【Mouse Station Set of 6 Pack】Our Mouse station is 6 packs for a set included with 6 keys. You can put them in the living room, bedroom, bathroom, garden, garage, etc. Keep you away from mouse damage to your property/kids/pets/food/flowers/wires, etc.
How Often Should You Check and Re-Bait Your Traps?
You should check snap traps at least once daily and live-catch traps every 12 hours. In warm areas or during severe infestations, increase your checks to twice daily to prevent decomposition and odor issues. Always re-bait after each catch, and replace bait if it dries out, develops a stale smell, or remains untouched for several days. Fresh bait is essential for continued attraction; stale bait can waste your effort and reduce trap effectiveness. Keep in mind that cultural preferences might influence your bait choices, but maintaining freshness is universally key. To ensure safety, never mix bait with pesticide poisons in the same trap and wash your hands thoroughly after handling bait or traps. Similar principles apply to outdoor feeders, where using squirrel-proof designs can prevent pests from stealing bait meant for targeted animals. For this purpose, hardware cloth offers a durable and effective barrier against persistent rodents.
Why Bait Must Stay on the Trigger, Not the Trap Surface
Placing bait directly on the trigger is crucial because it prevents bait theft and ensures the trap works effectively. If you put bait on the trap surface rather than the trigger, a mouse can easily lick or nibble at the food without ever pressing the mechanism. This allows them to steal bait repeatedly while the trap remains unfired and useless. To apply this correctly, the holding bar must be aligned precisely on the trigger hook using finesse to ensure reliable firing. To fix bait properly, apply a small, pea-sized dab of peanut butter or molasses directly onto the trigger or pedal. Smear it into the textured surface so it won’t slide off during attempts to retrieve it. This setup forces the mouse to exert full body weight onto the trigger to access the bait, which activates the trap. Surface placement of bait makes the mechanism inaccessible, giving mice an easy meal but preventing the trap from firing. Keep bait precisely centered on the trigger to eliminate bait theft and maximize your trap’s effectiveness. Using a material with a tight weave can help anchor bait more securely on textured triggers, similar to how secure fencing prevents escape. For homes with persistent pest issues, selecting the best options among fruit fly traps can similarly prevent bait theft and ensure success.