

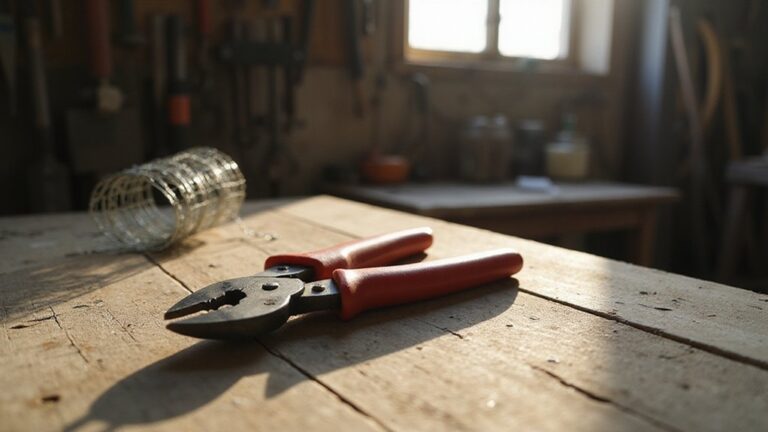
Cutting chicken wire might seem tricky at first, but with the right tools and a steady hand, you can do it safely and accurately.
Whether you’re making a small repair or a larger project, knowing how to handle this mesh properly can save you time and prevent injuries.
In this guide, you’ll learn the step-by-step process to cut chicken wire effectively, from preparing your workspace to finishing clean edges.
Keep reading to get the full details on making precise, safe cuts every time.
Safety Gear and Tools You’ll Need Before Cutting Chicken Wire
Before you start cutting chicken wire, it’s essential to wear the proper safety gear and gather the right tools to prevent injury. Start with protective gloves made from cut-resistant material, preferably with reinforced palms, to handle the mesh safely and avoid getting hooked. Safety glasses or goggles are a must-have—they protect your eyes from sharp wire fragments that may snap loose during cutting, especially when tension is released. Wear long sleeves, long pants, and closed-toe shoes to shield your skin and feet from accidental cuts or punctures.
For tools, choose wire cutters or tin snips that match the wire gauge you are working with. Using the correct tool ensures cleaner cuts and reduces hand fatigue. Set your materials on a flat, stable surface, and clamp down the wire if possible—this prevents slipping and gives you more control. Always measure and mark your cut line clearly before beginning. Proper preparation keeps your workspace safe, improves precision, and makes the process smoother. For additional guidance, consider how pond netting options compare in durability and mesh size for similar DIY projects.

ULTRA-THIN & PROTECTION - When you slide your hand into these cut resistant gloves, you will be struck by their lightweight, snug-fitting design and may question their protective capabilities. But rest assured, the Schwer glove offers serious hand protection for serious professionals who demand best-in-class performance.

ANSI A7 Cut Resistant—Our cut-resistant work gloves meet ANSI A7 standards, offering exceptional protection against medium to heavy cut hazards. Ideal for automotive assembly, metal stamping, and handling slitter blades, these gloves ensure your hands stay safe in high-risk environments

【High Level of Protection】The ProGuard ANSI A9 cut resistant work Gloves provide the top-tier protection, boasting the high cut resistance rating available. Each pair features state-of-the-art yarn technology, ensuring 360° reliable hand protection from extreme cutting hazards
Step-by-Step: Cutting Chicken Wire Along the Marked Line
Start your cut along the marked line by beginning at one outer edge of the mesh rather than the middle. This helps maintain tension in the wire, giving you better control from the start. Work one strand at a time, making short, controlled snips with shallow angles to prevent twisting the mesh. Installing a squirrel baffle can help protect bird feeders from unwanted access. Following similar principles, a cheap DIY yellow jacket trap can keep pests away using simple materials. A mosquito bit treatment can also be applied to standing water in the yard to control mosquito larvae.
Follow the line steadily, keeping your cutting tool aligned with the marked path and moving in a continuous motion. Cut close to the junctions whenever possible for a cleaner edge. Hold the sheet flat and taut to keep the wire tension consistent, which helps the tool track accurately. If the mesh shifts or drifts, pause momentarily to adjust your grip before continuing.
Once you have cut along the entire line, separate the pieces and trim any jagged or uneven sections. Use pliers to fold back loose ends to minimize snagging and bend sharp points inward. Finish by inspecting the cut edge for protruding wires, clearing away any scraps, and preparing the piece for installation. Select scissors for thinner wire up to 1 mm thick or wire cutters for thicker gauge up to 1.2 mm to ensure a clean cut without fraying.
How to Measure and Mark Chicken Wire for Cutting
To measure and mark chicken wire for cutting, start by determining the exact length and width you need. Add a small allowance—about 1 to 2 inches—to accommodate bends, overlaps, or final trimming. Fully unroll the chicken wire on a flat, stable surface to ensure accurate measurements. Spreading the mesh out prevents distortion of the hexagonal pattern, making your measurements precise. Keep the wire secured with weights or clamps to prevent curling or shifting during marking. When using chicken wire in a project like a trap, always prioritize humane handling and legal compliance to avoid harming unintended animals. For example, top bee traps for carpenter bees often require a mesh size that prevents larger animals from accessing the bait. Using tin snips or wire cutters works best for cleanly cutting through the wire mesh. Choose a visible marking tool such as a permanent marker, chalk, or masking tape that contrasts well against the silver wire. Use a straight edge to align along your measured lines. Carefully draw a clean, straight line across the mesh, following the grid lines rather than estimating through the pattern openings. For multiple sections or repeated cuts, mark each line separately to avoid confusion. Always double-check your measurements and markings, keeping the wire flat and taut for accuracy. Clear, precise marks help prevent mistakes during cutting, saving time and material and ensuring your pieces fit properly.

STRAIGHT CUT BULLDOG AVIATION SNIPS - Designed for straight cuts and wide curving left and right cuts. Bulldog model snips are best for making trim cuts in extra thick material.

TWO PIECE OFFSET SNIP SET - Includes left and right offset snips for straight cuts and tight curving left and right cuts. Offset model snips are best for making long cuts and trim cuts.

POWERFUL CUTTING CAPACITY: 8 inch bolt cutter with a maximum opening size of 0.23 inch (6 mm) and maximum cutting capacity of 1/10-inch (2.3 mm)
Which Tool Cuts Chicken Wire Best for Your Gauge
For thin chicken wire around 35 gauge, scissors are effective but tend to dull quickly on thicker or more rigid wire. For medium gauges, from 22 to 19, wire cutters or tin snips offer the best combination of control and strength, making clean cuts easier. When the wire reaches 18 gauge or thicker, heavy-duty wire cutters or aviation snips provide greater leverage and precision, preventing you from exerting excessive force. For stiff welded mesh or heavy-gauge material, bolt cutters are the safest and most efficient choice. You can also use aviation snips for longer runs, which allow for faster, cleaner cuts. Remember to keep your tools sharp—dull blades crush rather than cut, leading to frayed wire and uneven edges. Always select a tool rated for your wire’s gauge to reduce hand fatigue and avoid damaging the material or tool. For the best results when building a fence, selecting durable fence posts that properly support the wire will prevent sagging and make cutting easier. For protection against stinging insects, a bee suit can shield from wasps, but only if the material is thick enough to resist their stingers.
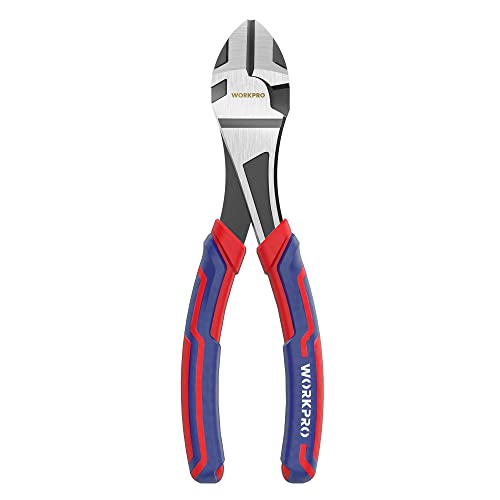
Transparent electrophoretic coating and covered in will help to prevent getting rusty. Wipe these pliers before using, then store them in a dry environment
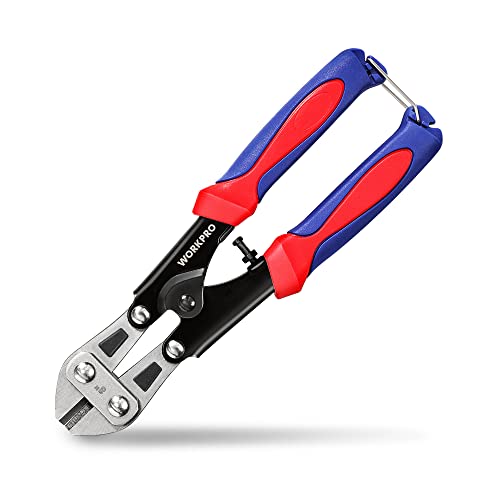
【High Hardness Material】 Durable steel with drop forged construction and heat treated for strength and durability. Up to 65 HRC. Max cutting capacity: 2.3mm (3/23in.) 【Note】Cutting Locks Is Not Recommended
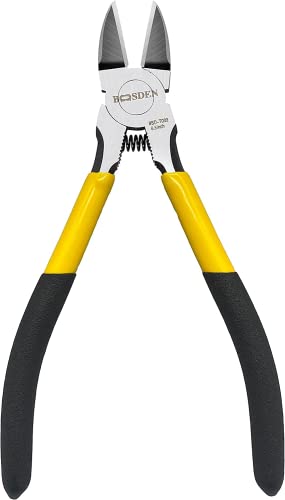
【Material】BOOSDEN Wire Cutters are made of special steel,high-carbon steel, This small wire cutters blades are high-frequency hardened, Ultra sharp indeed. And this dikes wire cutters is suitable for professional people use, can snip wires up to 12 AWG.
What to Do About Sharp Wires Sticking Out After Cutting
After cutting chicken wire, inspect the edges immediately because even a clean cut can leave sharp points that might cut your hands or snag your clothing. Look for burrs, hooks, and slender wire whiskers that can cause injury or damage. Never assume the edge is safe; treat it as a potential laceration hazard. For a strong and easy covering alternative, consider repurposing common household items such as straws or bottle caps to cap the sharp wire ends.
Use pliers to fold or twist any protruding wires back into the mesh. This step helps eliminate direct contact points, reducing the risk of injury during handling or installation. If folding alone doesn’t conceal the tips, cover the exposed areas with duct tape or a protective wooden strip. Make sure to cover the entire sharp section rather than just lightly taping it.
Always wear heavy-duty gloves and long sleeves while working with cut mesh to protect your hands and arms. Remember to collect all small wire clippings immediately, as they can puncture your skin or cause injuries if stepped on later. After folding and covering the edges, double-check the finished area to ensure no sharp points remain exposed before mounting or storing the mesh.

Size: Deer netting size 7 feet x 100 feet; garden netting mesh size 3/4"; color: black; Easy to use accessories included: 10pcs installation nails & 50pcs cable ties

Flush-cut Wire Cutter: Extra-long cutting edge can easily snips electrical wire up to 12 AWG. Excellent for zip ties, Artificial Flowers, jewelry making, beading wire, model kit, trimming circuit boards, electronics work, Ethernet cable preparation, and any that requires a flush cut

【The Ultimate All-in-One DIY Garden & Craft Kit】 This complete kit has everything you need in one box: a durable chicken wire roll (0.85mm thick), cutting pliers, safety gloves, zip ties, U-stakes, and plant wire. Start your project immediately for garden protection from animals or creative floral chicken wire designs.
How to Finish and Smooth the Cut Edges Safely
To safely finish and smooth the cut edges of chicken wire, start by locking sharp points by folding or twisting each cut end back into the mesh with pliers. Bending protruding tips flat against the wire helps prevent injury. Check both sides of the cut line, as ends may stick out in opposite directions. Re-bend any springy wires that pop back out during your initial work.
Next, flatten the section to reduce curl and exposure. Press down on the mesh with your hand or use a heavy object for extra control, especially during cleanup. This step helps keep the edges neat and minimizes sharp points.
Finally, smooth any remaining burrs by running a file or using medium-grit sandpaper. Work slowly to avoid weakening the surrounding wire. Afterward, clean the area thoroughly to remove metal fragments, and inspect the edge with gloves on by sight and touch. Dispose of offcuts immediately to prevent injury. Proper finishing ensures a safe, clean, and professional-looking edge on your chicken wire.
Common Chicken Wire Cutting Mistakes: and How to Fix Them
Even experienced DIYers can slip up when cutting chicken wire, but most mistakes are easy to avoid or fix. One common mistake is misreading the cut length. Always mark your measurements carefully and double-check before snipping. When precision is important, cut slightly oversize rather than too small, so you can adjust if needed. Tool maintenance is crucial; using dull or inappropriate tools can distort the wire and slow your progress. Match your cutter to the wire gauge and keep blades sharp to ensure clean cuts. Material selection also matters—heavier mesh requires sturdier cutters. Poor wire control can lead to uneven cuts; keep the mesh flat and stable during cutting. Avoid cutting across the wire’s grain. Instead, follow the natural wire lines with long, steady cuts to prevent jagged edges. Safety should never be overlooked—wear gloves and eye protection, and inspect edges after cutting to avoid injuries. Take your time to prevent rushed mistakes, and keep your work area tidy to reduce accidents.
How to Support the Mesh to Prevent Snapping While Cutting
Supporting the mesh properly is essential to prevent snapping while cutting. Start by laying the wire flat on a stable surface such as a workbench or plywood sheet. This helps keep the mesh from curling or vibrating during cutting, providing a solid platform. Use clamps to secure the mesh firmly in place, especially on larger panels, to prevent shifting. Position the clamps close to the cut line so only a small section remains unsupported, reducing the risk of movement or distortion. For heavily infested areas, using outdoor mosquito traps can complement physical barriers like cut mesh to reduce adult mosquito populations. A similar approach to stabilizing the cutting area is used when setting effective traps for armadillos to prevent the trap from tipping during capture. To ensure personal protection during this task, wearing nitrile gloves can provide chemical resistance against any oils or coatings on the wire.
As you cut, add light tension by pulling the separated section away from the clamp. Work from one end to the other, which results in cleaner snips and less strain on the wire. Support both sides of the cut line simultaneously to distribute tension evenly across the mesh, maintaining its integrity and avoiding jagged edges. If you unroll loose mesh, use weights or boards to keep it flat and prevent spring-back, ensuring consistent support throughout the process. Proper support stabilizes the mesh, improves cut precision, and significantly reduces the chances of snapping.

Better Protect Your Farm, Ranch & Home: Our wire fence clips great for attaching wire fencing to vinyl, wood, metal or other fence posts; Get a tight hog wire fence to protect your farm and home... NOTE: If you want to order Screws for those clamps, please search B09Y8Z4BRN at Amazon

HIGH QUALITY- Made from 304 Premium Stainless steel material with quality rubber cushioned. Salt resistant, anti rust, anti-corrosion, waterproof, oil-proof. Clamps are sturdy, strong and reliable. The quality rubber insulation on the clamps holds up flawlessly. It is pliable which protect the tube well and keeps the clamp securely in place.

【PRODUCT HIGHLIGHTS】This comprehensive kit includes 30 pcs clamps in 5 sizes: 6 of 1/4", 10 of 3/8", 10 of 1/2", 2 of 3/4", and 2 of 1". For your convenience, we also include 20 mounting screws and 10 securing screws, providing a complete solution for a wide range of projects and needs.
How to Dispose of Scraps and Keep Your Workspace Tidy
To keep your workspace tidy, dispose of scraps immediately after cutting the chicken wire. Wear cut-resistant gloves and eye protection because wire ends can spring unexpectedly and cause injury. Sweep the entire floor thoroughly to pick up tiny fragments that wandering scraps might leave behind. Collect all scraps into a rigid container rather than a plastic bag, since sharp ends can pierce and cause leaks. Flatten and cut scraps into manageable lengths, then bundle them by metal type. Use a magnet to distinguish ferrous from non-ferrous wire, which simplifies recycling. Check your local recycling guidelines before disposing of wire; scrap yards or transfer stations often accept chicken wire. Call ahead to confirm, as rules vary by facility. For fruit tree protection, top tree netting options often use a similar wire gauge that holds its shape well. For organized storage, keep a dedicated scrap bin beside your workspace, separating usable pieces from waste immediately to prevent tangled piles. If any wire is still reusable, consider giving it away through community groups before recycling. Timely disposal helps prevent hazardous buildup and keeps your workspace safe. When working nearby, remember that spraying from a distance is a safer approach to avoid sudden sting threats. A simple homemade trap using a vinegar-based lure can also help control gnats in the area, reducing the chance of pests clustering near your workspace.